Sunday, December 25, 2011

Spaghetti and meatballs

As temperatures drop and sun begins to set earlier, I start craving more time at home. Rather than going out into the cold, the perfect Saturday afternoon is spent reading, maybe sipping a cup of tea or a glass of wine, and then slowly making our way to the kitchen to prepare dinner. During the week, dinners have to be quick and simple, suitable to be consumed between 9pm when I typically get home and 1am when I'm falling asleep.  On Saturdays, however, we have the luxury of time to prepare a meal that requires more than two steps, to let sauces simmer, to set a proper table and enjoy the process of cooking.

Spaghetti and meatballs make the perfect meal for a chilly Saturday. It is comforting, involved enough to require a couple of hours, but not too complicated, and makes plenty of leftovers for the week. I've tried many versions of meatballs and a recent favorite is adapted from Williams-Sonoma. These meatballs are savory with prosciutto and Parmesan, yet still feel light. It is important to work the meat gently, flipping it with the whole hand as you mix just until combined rather than mashing it with the fingers to achieve the perfectly uniform mix that would result in tough meatballs. As a side we has sauteed escarole, but broccoli rabe, kale, or even a green salad would all work.

Roman-style meatballs
Adapted from Williams-Sonoma


Ingredients:

  • 1 1/2 cups fresh bread crumbs or fresh bread torn into small bits, crusts removed
  • 1/2 cup milk, any fat content will do
  • 4 oz. finely chopped prosciutto 
  • 1 lb. ground beef 
  • 1 lb. ground pork 
  • 2 eggs, lightly beaten 
  • 1/2 cup grated Parmigiano-Reggiano cheese 
  • 2 Tbs. finely chopped fresh flat-leaf parsley 
  • 2 tsp. finely chopped fresh oregano 
  • 6 Tbs. finely chopped fresh basil, plus a bit more torn basil for serving 
  • 5 garlic cloves, minced finely
  • 1 tsp. kosher salt, plus more, to taste  
  • 1/2 tsp. freshly ground pepper, plus more, to taste 
  • 5 Tbs. olive oil 
  • 1 medium yellow onion, diced
  • 2 can (28 oz.) whole peeled tomatoes with juices, crushed with your hands 
  • 1 lb dried spaghetti for serving
  • Directions:

    In a small bowl, combine the bread crumbs and milk and let stand for 10 minutes. 
    In a saucepan large enough to hold the 56 ounces of tomatoes and all the meatballs, over medium heat warm 3 Tbs. olive oil. Add the onion and cook, stirring occasionally, until softened and translucent, about 8 minutes. Add 2 minced garlic cloves and cook for 1 minute. Add the tomatoes and their juices, and season with salt and pepper. Bring to a simmer and cook, uncovered, until the sauce thickens, about 20 minutes. Stir in 3 Tbs. basil.

    In a large bowl, combine the prosciutto, ground beef, pork, eggs, cheese, parsley, oregano, the remaining 3 Tbs. of the basil, the remaining 3 of the minced garlic cloves, the 1 tsp. salt and the 1/2 tsp. pepper. Add the soaked bread crumbs and mix gently until combined. Divide the meat mixture into 1/4-cup portions and roll into balls slightly larger than golf-size. Place on a parchment-lined baking sheet.

    In a large skillet over medium-high heat, warm the remaining 2 Tbs. of the olive oil. Working in 2 batches, brown the meatballs on all sides, about 10 minutes per batch. I move the browned meatballs directly into the pan with the tomato sauce, but you can also hold on a plate until all meatballs are browned and then all them all together to the sauce.

    Simmer the meatballs in the sauce, turning occasionally and basting with the sauce, until cooked through, about 30 minutes. I tend to keep the sauce pan covered at this point. If the sauce is too watery as the meatballs finish cooking, then open the lid and simmer for another 10 minutes. 
    While the meatballs are cooking, bring a large pot of water to a boil. Add plenty of salt and cook the spaghetti a minute shy of the al dente time recommended on the package. Drain the spaghetti and return to the pot. Remove the cooked meatballs to a plate and keep warm on the back of the stove. Add the desired amount of sauce to the spaghetti and toss, over medium-low heat for a couple of minutes to allow some of the sauce to get absorbed into the noodles. Twist the spaghetti into warm bowls, top with meatballs, torn fresh basil, and freshly grated Parmesan cheese and serve immediately. Serves 4 - 6, with some meatballs left over.

Tuesday, December 20, 2011

Aromatherapy: Lavender cookies

One of my boyfriend’s complaints is that all of the lotions in the house have a lavender scent. Meanwhile, I envy that Madina discovered L’occitane lavender perfume before me. In short, if I could I would make everything smell like lavender.


There is no better time to enjoy the soothing scent of this humble looking plant than a holiday season. This recipe is an aromatherapy for all the cooks busy baking holiday treats. While many people have been praising lavender ice cream after the release of It’s Complicated, I find that application of butter to lavender (no, no other way around), gives this flower a second chance to blossom.


Ingredients:
1/3 cup sugar
1.5 teaspoon dried lavender blossoms, crushed
2 ounces unsalted butter, softened at the room temperature
2 ounces plain cream cheese
1 cup all-purpose white flour
½ fleur de sel


Mix sugar, 1 tsp of lavender, and lemon zest. Beat butter and cream cheese at a low speed for 1 minute. Add sugar mix to the butter mix beating for another minute or so until pale and fluffy. At a low speed, add flour and mix until the dough comes together. You might need to switch to a spatula and mix it by hand.

Gather the dough into a ball and freeze for 15 minutes.
 
Shape chilled, firm dough into a 4” log. Cover the log in a plastic wrap and freeze for 5 more minutes. While the dough is chilling, line a baking sheet with a parchment paper or a silpat. Pre-heat the oven to 350F.

Unwrap the dough and cut it into ¼ inch thick cookies arranging them on a baking sheet at least ½ inch apart. Sprinkle the cookies with fleur de sel and remaining .5 tsp of lavender.

Bake the cookies for 20 minutes or until the edges are golden. Cool completely on a wire rack. Enjoy with a glass of milk or champaign.

Thursday, November 3, 2011

Summer jewels - tomatoes

I know it has been forever… it is not that I stopped cooking, quite the opposite, I have been cooking non-stop from August until last week, because the markets were flourishing with produce. Without a doubt, however, tomato is the jewel of August harvest (perhaps a ruby:))
Beef steak, heirloom, champagne, green, stripped, Roma – each of these varieties is dramatically different from the other. Once, a Brooklyn farmer told me he does not eat tomatoes until there in a full bloom to get the best of the best. So before, you turn into tasteless watery winter grocery store tomatoes, try these recipes to seal the sweet, tangy, meaty, and bright flavors of summer fruits. 

Honey roasted tomatoes with basil olive oil
stems from a bunch of basil leaves
2 tbsp. olive oil
Pint cherry or grape tomatoes, halved
2 tbsp. local honey
Kosher salt and freshly ground black pepper, to taste

Pre-heat the oven to 250°.
Arrange tomato halves cut side up on an aluminum foil—lined baking sheet. Whisk together remaining ingredients in a bowl and then drizzle over tomatoes. Bake until tomatoes are half-dried and concentrated, 3–4 hours.
Serve on top of the pizza, in salads, tossed with pasta.

Fiery tomato sauce
3 ounces rich olive oil
2 garlic cloves
¼ tsp. red pepper flakes
10 Roma tomatoes, halved lengthwise
Kosher salt and freshly ground black pepper, to taste

In a small sauce pan combine olive oil, garlic, and pepper flakes. Over a very low fire, heat up the olive oil mixture. Once the oil is hot, turn off the heat and let the oil cool for about 1 hour.

Strain the oil discarding pepper flakes and garlic. Pre-heat the oven to 400. Arrange tomato halves cut side up on an aluminum foil—lined baking sheet. Drizzle with the infused olive oil, sprinkle over with salt and pepper

Roast for 1 hour or until tomatoes “collapse”. Transfer tomatoes and all the juices into a bowl (for immersion blender) or a blender. Blend the tomatoes until the sauce is smooth. Adjust salt and pepper to your liking.

Saturday, October 29, 2011

Crepe with ricotta and fall fruit compote

Crepe can be tricky and tedious to make.  They are especially tedious if you are making them for a hungry family of 5 good eaters.  The woman patient enough to do it would be our mom. She made the most delicious crepe that were so lacy and practically see-through you coule could wear one as a scarf.  It was by far our favorite breakfast. It took at least an hour.   During that hour, my siblings and I stalked around the kitchen, peering into the skillet, and even "stealing" the imperfect crepe, which did not please mom at all.  She would send us away, threatening to never make crepe again if we didn't leave her alone, and then call us back once she needed someone to apply melted butter to the edges to keep them soft. Then we would dig in, slathering the already rich crepe with sour cream and honey, rolling them up and dipping in sugar, tearing them into pieces and eating plain. It was quite possibly the least nutritious breakfast we were allowed and we loved every carb-loaded bite.

Every time I make crepe, I travel back to our childhood kitchen.  Except now, I want balance in my breakfast, so I fill them with fresh ricotta cheese and top them with sauteed apples and pears sweetened with local honey.  Considering that I'm not cooking for a family of 5, I eat leftover crepe throughout the week, often drizzled with honey and a squeeze of lemon or smeared with Justin's chocolate and hazelnut butter.

The point is, although a little demanding, crepe will make you and the people you care about very very happy.   Crepe are best made at home in a non-stick skillet that you easily pick up and turn to evenly distribute the batter.

Crepe with ricotta and fall fruit compote

1. Make the crepe (adapted from Epicurious.com)
1 1/3 cups whole milk, room temperature
1 cup all purpose flour
3 large eggs, whisked
4 tablespoons unsalted butter, melted and divided to add 3 tablespoons to the batter and using 1 to brush the skillet
1 tablespoon sugar
1/4 teaspoon salt

Mix the ingredients together in a blender  or whisk in a medium bowl until smooth and let rest for at least 30 minutes or overnight.  Warm your favorite non-stick skillet (anywhere between 7 and 10 inches should work) over medium-low heat.  Brush the skillet with a bit of melted butter, pour in 1/8 - 1/4 cups (depending on your skillet size) of batter in the middle of the skillet and quickly swirl it around the skillet.  In about 1 minute, the crepe will be lightly browned and set on the underside.  Flip the crepe with a wide spatula and cook for another 30 - 45 seconds.  Remove to a plate.  Crepe can be stacked and they won't stick.


2. Make the fruit compote
1 large apple, cored and sliced into 8 wedges
1 large pear, cored and sliced into 8 wedges
1 tablespoon of butter
1/2 cup maple syrup
Juice of 1/2 lemon
Couple dashes of ground cinnamon

Warm the butter in a medium skillet over medium heat and add the apple slices first.  Saute, turning occasionally for 2 - 3 minutes until the apples start to soften. Add the pear slices, give it a good stir, and cook for another couple of minutes.  Add the maple syrup, the lemon juice, and the cinnamon and let the mixture simmer for another 5 minutes until the apples are soft and the pears start to break down.  Turn off the heat and serve warm.  This compote is also lovely on pancakes or even plain yogurt. 
 
3. Make the ricotta filling and fill the crepe. 
1 cup fresh ricotta, store-bought or homemade
Zest of 1 lemon
2 - 4 tablespoons of good flavorful honey
2 tablespoons of butter


Mix the ingredient together.  Place 2 tablespoons of the filling in the middle of the crepe and fold the edges over like a pouch.  Repeat until you run out of filling.  Warm 1 tablespoons of butter over medium-high heat and brown the crepe pouches on both sides. Repeat with more butter until all the crepe pouches are browned.  

Serve with fruit compote and honey and lemon for the extra crepe.  Mom pouring milky tea is optional. 

Sunday, October 2, 2011

Turkish stuffed eggplant (Imam Bayildi)

Summer has definitely come to an end in New York, as evidenced by apples at the farmers' markets, rainy runs among the changing leaves in Prospect Park, and my cat jumping into bed in the middle of the night.  Fortunately, some remnants of summer are still around, like small eggplants and field-grown tomatoes, and I intend to enjoy them for as long as I can before it is all brassicas and squash (oh, and those wonderful New York apples).  

Imam Bayildi is a Turkish dish that combines the lovely small eggplants with tomatoes, caramelized onions, and plenty of rich olive oil.  It is usually served at room temperature as a meze (an appetizer), but I think it also tastes great hot as a side to some fish or lamb or just on top of bulgur wheat with yogurt.  As much as I love olive oil, Imam Bayildi can be a little heavy, so the recipe here cuts down on the oil and lets the natural flavors of eggplant and tomato show.  Stewy and soft, I think this dish makes the perfect bridge between shorts and corduroys, light cardigans and cashmere sweaters.  
Imam Bayildi 
Adapted from Clifford A Wright

2 small eggplants
1 medium onion, cut in half lengthwise and thinly sliced across 
3 cloves of garlic, peeled and thinly sliced
2 - 3 ripe tomatoes, seeded and diced
1/4 cup of chopped parsley, divided
3 - 4 sprigs of thyme, leaves pulled off
1/4 teaspoon dried mint
4 tablespoons of good olive oil, divided
Juice of 1/4 lemon
1/4 cup of water
Salt and pepper to taste

Cut off the stem portion of each eggplant, cut it in half lengthwise, slice off a little bit of skin from the side of the eggplant to make sure it sits well in the skillet, and cut a deep slit down the flesh, without cutting all the way through.  Generously salt the eggplant and let it sit on a paper towel, flesh side up, for 15 minutes, then flesh side down for another 15 minutes.  
Warm 2 tablespoons of olive oil in a medium skillet. When the oil is almost smoking, pat the eggplant dry and sear, flesh side down, in the skillet.  Once the eggplant is well-browned, sear the other side, and remove to a plate.


Warm another tablespoon of olive oil in the same skillet and saute the onion and the garlic over medium heat for 10 - 15 minutes, stirring occasionally to help onions turn golden and make sure you don't burn the garlic.  Combine the caramelized onions, the diced tomatoes, most of the parsley (reserve the rest for garnish), the thyme leaves, the dried mint in a small bowl and season well with salt and pepper.  Pour the last tablespoon of olive oil into the skillet, put in the eggplant, flesh side up, and sprinkle the eggplant with the lemon juice.  Fill with the eggplant with the onion and tomato mixture and pour the remaining filling into the skillet. Add the water, bring the boil and simmer on low heat for 45 - 50 minutes until the eggplant is soft.  Check the skillet occasionally and add more water if it seems dry.  Serve hot or let cool. As with most stewy dishes, this one also tastes great in a day or so.  

Thursday, August 18, 2011

David meets Jenny at the Walker Jones Farm

Not too long ago I started volunteering at the Walker Jones Farm. The Farm at Walker Jones is an emerging urban farm based on Walker Jones Education Campus, a DC Public School. I discovered the farm during a bike ride and was stunned by the diversity of the crops grown on such a small plot of land. Here, you can pick tomatoes, cucumbers, squash, and pumpkins right from the vine. The freshness of vegetables beats the traditional farmer’s market produce. So if you want to get the freshest vegetables in DC or simply help the team of talented farmers and dedicated volunteers, stop by on Tuesdays and Thursdays from 1 to 6PM and on Sundays from noon to 4PM.

Before heading to the farm last weekend, I was flipping through the August issue of Saveur and almost jumped off my chair when I saw the recipe of Jenny’s Splendid Ice Cream. Ok, let me tell you this ice cream is soooo good that I am willing to go to Columbus just to have some fresh Jenny’s (by the way of you are in let me know, we can totally make this happen). Immediately, I scratched the plan to make scones in the evening to test Jenny’s ice cream recipe.

Few hours later, while taking a break from harvesting spaghetti squash, I noticed a beautiful bush of mint, and the ice cream idea started to come together. The final recipe combines David Lebovitz’ chocolate chip technique and Jenny’s eggless ice cream base resulting in an airy ice cream with a fresh mint flavor and a dark chocolate crunch.

Fresh mint chocolate chip ice cream
2cups heavy cream
1 cup whole milk
2/3 cup sugar
2 tbsp. light corn syrup
¼ kosher salt
2 cups fresh mint

¼ cup whole milk
4 tsp. cornstarch
3 tbsp. cream cheese

6 oz. dark chocolate

Mix heavy cream, 1 cup of milk, sugar, corn syrup, salt, and mint in a large pot. Cover and bring to boil. Boil for 1 minute, turn off the heat. With the lid closed infuse the mixture for 2 hours.

Strain the liquid into a large bowl and press the mint through a chinois/fine mesh strainer to extract the mint flavor. Discard mint and pour the liquid back into the pot. Bring the liquid to a rolling boil.

While the mint liquid is getting warm, mix cornstarch and remaining milk until the mixture is well combined. Stir the liquid into the pot and cook until the mixture thickens for about 2 minutes.  The mixture should be thick enough to coat the back of the wooden spoon. Turn off the heat.

Place cream cheese in a bowl and pour in ¼ cup of hot mixture, whisk until smooth. Add the cream cheese mixture to the pot and stir the base for a minute. The ice cream base is almost finished.

Fill a large bowl with ice water. Pour the ice cream base into a large Ziploc bag. Place a closed bag into the ice water. This will allow the base to cool just in 10 minutes.

Once the base is cool, transfer it into the ice cream maker and follow manufacturing instructions.


Several minutes before the ice cream is ready and your ice cream machine starts to sound like an old Soviet train, melt the chocolate in a microwave or a water bath. Turn off the ice cream maker.

Drizzle the bottom and the sides of a large plastic container with melted chocolate and top with a layer of ice cream. Drizzle more chocolate over the ice cream and top with another layer of ice cream. Using a dining knife, break frozen chocolate into small chips. Continue layering chocolate and ice cream breaking the chocolate every 1 or 2 layers.

Freeze the ice cream for at least 2 hours and enjoy on a hot summer day after few hours of farming.


Saturday, August 6, 2011

Summer pizza with prosciutto, nectarines, and arugula


People, I am asking you to turn on your ovens.  I know, it sounds nearly insane given the recent East Coast heat wave, but that seems to be abating and the 15 minutes that your oven will run are totally worth it.  You will be rewarded with an awesome light supper of crispy pizza that combines salty funky prosciutto with caramelized nectarines and peppery arugula.  The only dish I can think more seasonally appropriate is a salad of tomatoes and mozzarella, but I've been eating it practically daily and could use a break.

I have to admit that I am generally very skeptical about adding fruit to savory dishes.  I know that its weird and I know that I generally love the results, but something about it still doesn't feel right.  However, when a recent trip to the market resulted in lots of juicy Jersey nectarines and a big bag of arugula, my only thought was to add prosciutto and a little dough.  I made a quick pizza dough using a slightly augmented recipe from the Silver Spoon cookbook, and then improvised my way around.  I also went to an excellent class on Greek wines that afternoon and the Moraitis 2010 Assyriko from Santorini was just right.  I struggled for a minute with drinking a Greek wine with a pseudo-Italian meal, but quickly got over it and thoroughly enjoyed this floral, peachy, minerally wine that has a good touch of salinity.


Summer pizza with prosciutto, nectarines, and arugula


For the dough:
1 1/4 cups of all-purpose flour
3/4 teaspoons of salt
1 teaspoon active dry yeast
1/2 cup warm water
1 tablespoon olive oil

For the toppings:
4 ounces prosciutto
1 large nectarine, ripe but still firm, halved, pitted, and sliced into thin segments
1 - 2 cups arugula, depending on how much you want on top of your pizza, washed and dried
Juice of 1/2 lemon
A few shavings of Parmesan
2 -3 tablespoons good olive oil
Salt and pepper, to taste

First, make the dough by mixing the flour, salt, and yeast in one large bowl and the water and the olive oil in another small bowl or a measuring cup.  Add water and olive oil to the flour mixture, stirring as you go until the mass comes together into a semi-coherent dough. Add more flour if it feels wet or a bit more water if it feels dry.  Dump the dough onto a floured surface and knead for 4 -5 minutes until the dough is elastic and soft. Lightly oil the large bowl and turn the dough around in the bowl to cover all sides with the oil.  Cover with a kitchen towel or plastic wrap and let it rise for 2 hours until doubled in size.  If you prefer, you can make the dough the night before and slowly let it rise in the fridge for 12 - 24 hours.  Do not bother cleaning up the flour, you'll need the counter soon enough. Move the risen dough onto your still-floured surface and press down gently. Shape into a ball again and let it rise for another 20 minutes.  While the dough is rising, preheat your oven to its top temperature (mine goes upt to a measly 500F).  Sprinkle a hot baking sheet with corn meal or millet, if you are me and that is all you have.  Roll out the dough as thin as you like and top it with slightly overlapping slices of prosciutto, slices of nectarines and Parmesan shavings. Bake for 10 - 15 minutes until lightly blistered and you can't resist the smells of salty pork and caramelized fruit in your house.  Meanwhile, toss the arugula with the lemon juice, olive oil, salt and pepper,  You want it flavorful but not soggy, so go easy here.  Take the pizza out of the oven and heap on the arugula however you like.  You can always eat the leftover arugula in a salad, maybe with some radishes and tomatoes.  Serve immediately.  This made 2 meals for me, but can easily be multiplied for those with more robust appetites.

Monday, July 25, 2011

Pulled Pork Sandwich

To spend a month abroad means eating out every day, not knowing where your food came from, who handled it, was the cook in a good mood that day or not. A whole month abroad also means shopping in foreign bazaars, smelling unknown spices, eating tropical fruit, and drafting new recipes. The idea for this dish came to me over a cup of Indonesian coffee with Dutch pastries.

During the colonization of the 19th century, the Dutch introduced classic European pastries to Indonesia. Since then, Indonesian cooks have been applying European baking techniques to local ingredients to make guava filled danish, avocado chocolate tort, and melon cheesecake. To make this pulled pork sandwich, I used a mix of Jamaican spices for the dry rub, mango for the BBQ sauce, and Smitten Kitchen light brioche buns. This dish should be served at the next European, Caribbean and South East Asian summit :)

Pulled pork
1 2-pound cured ham steak
½ tsp of the follow dry spices: pimento, ginger, red pepper, black pepper, garlic powder, onion powder, thyme, cumin, brown sugar
2 tbsp of salt
Mix the spices and salt. Rub the spice mix into the steak and refrigerate for 2 hours. Wash off the rub with cold water and pat dry the steak.

While the meat is marinating make the BBQ sauce.

BBQ sauce
4 large ripe red tomatoes
1 freshno pepper
1 medium size red onion
1 ripe yellow mango
1 tsp sweet paprika
1 tsp white pepper
1 tbsp kosher salt

Preheat the grill to 400F.
Cut tomatoes in a half. Cut onions into thick rings. Place tomatoes (cut side down), onions, and peppers on the grill. Grill the vegetables until they are well charred. Lower the grill temperature

Using a blender or a food processor, puree vegetables with remaining ingredients into a smooth sauce. Adjust salt and pepper.

Lower the grill to 250F. Place the steak on the grill and cook for at least 2 hours. The internal temperature of the meat should be at least170F. Remove the meat from the grill. Let it cool.

Warm the BBQ sauce in a large skillet. Shred the meat or cut it into fine pieces. Mix the meat with the sauce letting it absorb the juices for at least 10 minutes.

Slice the bun in a half and stuff it with meat. Enjoy with few pickles, fries, and a good beer.

Monday, July 18, 2011

Mussels with bacon and a green bean salad


This is one of those wonderful Friday meals.  I love socializing as much as the next gal, but so often my perfect Friday is a great homemade meal, fantastic company (that will be missed for the next couple of months), maybe a good movie/documentary, maybe a little reading in bed.  Last Friday definitely fit the bill, with mussels steamed in wine with smoky bacon and a few vegetables, oven-fries make with duck fat instead of olive oil (we are all about indulgence around here), and a crisp seasonal salad.
Sometimes the best recipes are inspired by a completely different idea.  I saw a stew of fresh corn, bacon and clams that sounded a little heavy, but I really loved the idea of bacon, tomatoes, and shell fish.  Taking that inspiration to a more classic approach to steamed mussels, I added shallots and fennel, a healthy pour of wine, and lots of parsley.   I also quickly realized that Friday was right after Bastille Day, so applying a French theme to the salad made lots of sense, resulting in a mix of slender green beans, thinly sliced radishes and fennel, all dressed with a tangy vinaigrette.  My wine guys at the favorite Brooklyn Wine Exchange did not disappoint with a suggestion of round and lush La Dilettante, a 2009 Vouvray from Domaine Breton.  It managed to offer freshness and minerality to the seafood, while standing up to smoky bacon.

Steamed mussels with bacon
2 large shallots, diced finely
1/2 medium fennel head, diced finely
2-3 garlic cloves, sliced thinly
1/4 pound of your favorite bacon
2 pounds mussels, beards removed and scrubbed, for 2 people
2 tablespoons of olive oil
3/4 cups of white wine
1 medium tomato, diced
1/2 cup parsley, chopped
1/2 cup fennel fronds, chopped
Salt and pepper to taste

Warm a large Dutch oven over medium heat and add the olive oil.  Add the shallots, garlic, and fennel and saute until softened and starting to take on a bit of color.  Add the bacon, reduce the heat to medium-low and cook until fat is rendered and the bacon is crispy.  Add the mussels, the tomato, the wine and stir well.  Cover the pot and cook, stirring or shaking every couple of minutes, for 5 - 10 minutes, until the mussels are open.  Taste the sauce in pot and season with salt and pepper, as you like.  Stir in the parsley and the fennel fronds.  Serve immediately with french fries and good bread for soaking in the juice.

Green beans, radishes, fennel salad


1 pound of slender green beans, rinsed and trimmed
1/4 pound radishes, halved and sliced thinly
1/2 medium fennel head (leftover from the mussels), sliced thinly
1 medium shallot, diced finely
1/4 cup of sherry wine vinegar
1 tablespoon of good mustard
1/3 - 1/2 cup of good olive oil, depending on how acidic you like your dressing
1/4 cup of parsley, chopped
1/4 cup of fennel fronds, chopped
Plenty of salt and freshly ground pepper

Bring a medium pot of water to the boil, add plenty of salt (as if cooking pasta), and dump in the green beans.  Cook for 2 -3 minutes until a bit tender but still crisp.  Meanwhile, make the dressing by combining the shallots, the vinegar, the mustard, salt, pepper, and olive oil.  Mix or shake well.
Drain the green beans in a colander and cool them quickly, either by submerging in ice water or running cold water over them.  Shake off excess water and combine, in a medium bowl with the radishes, the fennels, the herbs, a bit of salt and more pepper, and the dressing.  You may have dressing left over and it will keep fine in the fridge for a week and taste delicious on any green salad.  Serve with the mussels and feel you arteries get a good, tasty scrub.


Monday, July 11, 2011

Strawberry cake

First, I want to apologize to Liz's sister, who has been asking for this recipe for a while. My crazy travels to Indonesia, Russia, and Kazakhstan have kept me busy and away from my kitchen. A post about the food cultures in these countries is coming up soon. And now, let’s get to the cake business.

About a year ago, I discovered a 7-minute frosting that can be described as a heavy cream marshmallow sugar cloud goodness :). This frosting has a light taste, but a firm body, which makes it perfect for the strawberry cake featured in the May edition of the Saveur magazine.

The original cake recipe calls for 16 Tbsp of butter, 8 oz. of cream cheese, 1 cup of canola oil, and ... a pack of cholesterol medicine. Despite that, the Saveur recipe became the inspiration for a flavorful, yet light cake with strawberries covered in the clouds of frosting.

Cake
3 cups of cake flour, plus 2 tbsp for the pans
1 tbsp baking powder
1/2 tsp kosher salt
1 cup of whole milk
1/2 cup of purred strawberries pressed through a chinois
2 tbsp of beet food coloring from 1 graded and squeezed beet (you can use conventional food coloring if you insist)
1/2 cup of sugar
1/2 cup of canola oil
1 tsp vanilla extract
3 large eggs

Pre-heat the oven to 350°. Butter and flour two 9″ round cake pans.
Mix flour, baking powder, and salt.
Whisk together milk, strawberry pure, and 2 tbs. of food coloring.
Beat sugar, oil, vanilla, and eggs on the medium-high speed until pale and smooth, 2–3 minutes.
In 3 additions add dry and wet ingredients to the sugar mixture beginning and ending with the dry ingredients. Mix until the batter is smooth.
Divide the batter between the two pans and smooth the tops.
Bake for 40 minutes or until a toothpick inserted in the middle of the cakes comes out clean.
Cool the cakes for15 minutes, unmold, then cool for another 15 minutes until the cakes are at the room temperature.

Frosting
5 tbsp of the room temperature water
1/4 tsp cream of tartar
1 cup of sugar
2 large egg whites at the room temperature
Seeds from 1 vanilla bean

Whisk all ingredients except the vanilla, in a large glass bowl.
Fill a wide skilled with water (1 inch) and bring the water to simmer.
Set the bowl in the skillet making sure that the water level is at least as high as the depth of the egg whites.
Beat the mixture on the low speed until it reaches 140F. Don't stop beating when the bowl is in the skillet. You can take the bowl out of the skilled to check the temperature.
Once the frosting reaches 140F, switch the mixer to high and beat the frosting for another five minutes.
Remove the bowl from the skillet and add the vanilla. Beat the frosting on high for two more minutes until it becomes room temperature.
Refridgerate for at least 15 minutes before using.

Assembling
1/2 cup of hulled strawberries cut vertically into 3 pieces

Flip one cake upside down and spread 1/3 cup of the frosting on top. Arrange the strawberries in one layer and top with ¼ cup of the frosting.
Place the second layer of the cake, top side up. Frost the top and the sides with 1/2 cup of the frosting. Refrigerate for 15 minutes. Cover the cake with the rest of the frosting and refrigerate for 1 hour before serving.

Serve at the room temperature.

Sunday, June 26, 2011

Summer risotto with zucchini and mushrooms


One of my favorite habits is bringing my own lunch.  It helps that I love leftovers.  Sometimes, it is a simple vegetable salad, like roasted beets and fennel, a bit of local mozzarella with a piece of bread from my favorite Orwashers bakery.  Other weeks, its leftovers from weekend cooking or something I prepared for the week on Sunday.  Almost always, it is better than anything I could buy in one of many "cafeterias" with salad and sushi bars right next to each other (does anybody else find it odd?).  Granted, there are many days when I don't bring lunch, but this week I'm looking forward to a lovely risotto with local zucchini, mushrooms, herbs, finished with freshly grated Parmesan.


Now, I know that we are all very busy and the idea of packing a lunch may seem overwhelming.  Not to channel Jamie Oliver, but I want food that helps me get through a very busy day.  So next Sunday, I urge you to hit the farmers' market (or your local grocer), pull out a skillet, dump some rice, sip on a summer white and stir yourself some lunch.  It is a 45 minute effort (think of it as 9 minutes per workday, which is faster than standing in line at Europa cafe) that will reward you every day of the week. 

Risotto with zucchini and mushrooms

1 large or 2 medium zucchini, rinsed and cut into 1/4 inch cubes
1 pound of cremini mushrooms, scrubbed and cut into 1/4 inch cubes
1 medium onion (I used the bulb and the greens of a mild spring onion), diced
3 cloves of garlic or 1 head of spring garlic, chopped
The leaves of 6 6 sprigs of thyme
1 sprig of rosemary or savory (I used dried savory from Keith's Farm)
6 - 8 cups of chicken stock, preferably homemade
1 cup of white wine (no need to be fancy, but use something you would drink)
2 cups of risotto rice, such as Arborio
3 tablespoons of olive oil
2 tablespoons of butter
1 cup of freshly grated Parmesan
8 sprigs of parsley, chopped
A dozen basil leaves, chopped
Salt and freshly ground pepper

In a medium pan, bring the chicken stock to the boil and then reduce the heat to a bare simmer.  Warm a large saute pan over medium-high heat with one tablespoon of olive oil.  Saute the zucchini, stirring occasionally and salting at the end, until yielding and slightly browned.  Move to a bowl.  Add another tablespoon of olive oil and cook the mushrooms over high heat, stirring once in a while until well-browned.  Do not disturb the mushrooms for the first 3 - 4 minutes in the pan.  They will release a lot of water and you want that water to evaporate so that the mushrooms can brown nicely.  Season the mushrooms with salt and pepper and move them to the bowl with zucchini.
Wipe or rinse the pan, then heat the remaining 1 tablespoons of olive oil with 1 tablespoon of butter over low-medium heat.  Add the onion, garlic, thyme, and rosemary or savory, and cook until softened and fragrant, but not browning.  Add the rice and stir for 2 -3 minutes to coat the rice with the fat in the pan.  Pour in the wine and stir until most of the wine is absorbed or evaporated.  Now add the hot stock, 1 ladle at a time, stirring frequently, until the rice is plump with a slightly chewy center and the "sauce"  leaves traces on the bottom of the pan.  You don't want rice soup but you also don't want rice pilaf.  Think of the desired texture as that of rice pudding, but with stock instead of milk.  This usually takes me at least 20 minutes.  Before you add the last ladleful, fold in the zucchini and the mushrooms.  Add the last of the stock and stir for a bit to let the flavors combine.  Turn off the heat and stir in Parmesan, the last tablespoon of butter, the parsley, the basil, and some pepper.  Taste and add more salt, if needed.  Serve immediately and garnish with more Parmesan, if you like to spoil yourself like that.  Pat yourself on the back for making a delicious and healthy lunch that is a lot better than a turkey club sandwich.  

Tuesday, June 14, 2011

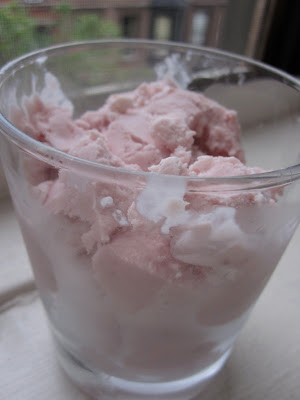
Strawberry-rhubarb ice cream

So, my sister is a total morning person.  When I visit her, by the time I wake up, she has cleaned the house, done yoga, finished her weekly grocery shopping, and made us a coffee.  I, on the other hand, crankily get out of bed around 11, searching for that coffee and don't really get going till 1 or so.  In my defense, I am writing this post at 2am. See, we all have our special skills.
Ok, back from the sleeping tangent  (it is 2am, after all).  Our wake-up preferences affect when we shop at the farmers' market.  She is usually there just in time for the opening.  I am usually rushing before the stands close at 3pm or so.  Both approaches have their advantage - she gets the pick of the best stuff, while I get the end-of-day bargains.  I am going to argue that my strategy works really well for produce that is in season and plentiful.  To prove my point, I bought $10 worth of strawberries at about 3:35pm last Saturday that will easily last me for the entire week.  I would have paid $15 for the same berries if I showed up earlier.
Now, I looooove strawberries, but even I have my limits.  It was clearly time for ice cream.  I had some rhubarb at home and thought the classic combo would work really well with cream and frozen.  I was right; the flavors work great.  What I did not realize until later was that rhubarb is high in pectin and adds a particularly luscious quality to the ice cream.  Err, I am eating this stuff out of the tub as I type.


The recipe is based on Jenni Britton's formula that uses cornstarch instead of egg yolks.  I find that absence of yolks leads to a cleaner tasting base that is particularly suitable for fruity ice creams.  I also swapped 1 cup of milk with the fruit.

Strawberry-rhubarb ice cream
5 stalks of ripe rhubarb, chopped into 1/4 inch pieces
1/2 pound of good local strawberries, hulled and quartered
1 cup whole milk
1 tablespoon plus 1 teaspoon of cornstarch (that's 4 teaspoons if you don't want to dirty two spoons)
11/4 cups of heavy cream
2/3 cups of sugar for the ice cream base plus 1/2 cup of sugar for the strawberries and rhubarb
1 teaspoon of vanilla extract
2 tablespoons of cream cheese, softened
1/8 teaspoon of salt

First, cook the rhubarb and 1/2 cup of sugar over medium-low heat until the the mixture comes to a boil and the rhubarb starts breaking down.  Add the strawberries, bring to a boil once more, and turn off the heat.  You don't want to make jam here.  Let the mixture hang out and cool a bit while you make the ice cream base.
Mix well the 2 tablespoons (also known as a bit) of milk with the cornstarch in a small container.  Heat up the rest of the milk, the cream, and the sugar in a medium saucepan over medium heat until boiling.  Turn off the heat and whisk in the cornstarch slurry.  Turn the heat back on to medium-low and cook, whisking frequently, until the milk mixture coats the back of a spoon and a trail is left if you drag your finger across it.  Fold in 11/4 cup of the strawberry-rhubarb mixture and cook for another minute.  Off the heat, whisk in the vanilla, the cream cheese, and the salt.   Set the pot with the ice cream base in an ice bath and cool, stirring occasionally for 20 minutes or so.  Don't worry, there are no egg yolks to curdle here, so you don't have to cool it very fast.
Refrigerate the base until cold.  Churn in your ice cream maker per directions.  Try not to eat it off the spoon.  Once churned, move it to another container and freeze for at least a couple of hours to allow the ice cream to "mature".  Have a date.  Eat.  Drink a nice sparkling desert wine (there are strawberries involved, after all).

Tuesday, June 7, 2011

Perfect brunch - dandelion greens salad with bacon, spring garlic, and soft-boiled egg


One of my favorite restaurants is al di la in Park Slope, Brooklyn.  I love the perfectly shabby, cozy dining room with its big window, pressed tin ceiling and an old chandelier.  I would eat their calf liver weekly, if allowed, and I have friends obsessed with their roast chicken.  I've never met anybody who didn't like the place.  Perhaps if I did, I would not be friends with them.  Last time there, my dear friend Assel and I shared a warm dandelion greens salad, which immediately sprang to mind when I spotted the greens at my Sunday market.  I also spotted spring garlic, odds and ends pieces of local bacon (great deal if your farmer sells it, because it is usually cheaper than sliced bacon), and eggs.  Suddenly, I was looking at an excellent Sunday brunch - bitter dandelions wilted with sharp bacony dressing, mellow bites of garlic and rich egg yolk caught in the leaves, a hunk of  Orwasher's excellent ale bread to sop it all up.  I used about 1/3 a large bunch of greens with 1/4 pound of bacon and 1 egg (well, I added a couple quail eggs given to me at the market as well).  This was a very generous lunch for one, but would also serve two, if you are people with normal appetites or have something else to eat.  I would boil another egg, though; you don't want to fight over egg yolk first thing on a lovely Sunday afternoon.   Follow with a coffee and some local strawberries, as if you needed another reminder that summer is awesome.

Warm dandelion greens salad with bacon, spring garlic, and egg

Ingredients:
1/3 bunch dandelion greens, torn into 2 -3 inch pieces, washed and dried well
Parsley leaves, picked off a few sprigs (optional, but tasty)
1/4 pound of applewood smoked bacon, chopped into 1/4 inch pieces
1 sprig of spring garlic, sliced
1 - 2 fresh eggs, depending if you are sharing or being selfish
1 - 2 tablespoons of olive oil, adjusted to your bacon's fattiness
1/2 lemon, juiced
2 -3 tablespoons Sherry wine vinegar
Salt and pepper to taste.  I would suggest adding salt to the salad after you dress it, if necessary, because bacon can be salty.

For a perfect soft-boiled egg, put an egg in a small pot with room temperature water and bring to the boil.  Boil for exactly 4 minutes, transfer to a bowl with room temperature water to let cool.  Meanwhile, warm a small skillet with a tablespoon of oil over low-medium heat and cook the bacon to render the fat and let it crisp.  With a spoon (ideally, a slotted one), transfer the bacon to a medium mixing bowl leaving the fat behind.  To this awesome bacon fat add the spring garlic and saute gently until the garlic is softened and it smells like garlicky cured pork in your kitchen.  Turn off the heat and check the amount of fat in the pan.  If it looks dry, add another tablespoon of olive oil and whisk in the lemon juice, 2 tablespoons of vinegar, and freshly ground pepper.  Put the greens and parsley on top of the bacon, dump the warm dressing and toss thoroughly. Let the greens sit, wilt, and relax, while you peel the egg, carefully.  Taste the salad and add salt and a bit more vinegar, if needed.  Remember, the egg will bring more fat to the party, so you want the salad on the acidic side to start with.  Put the salad in a wide, shallow serving bowl and top with the egg that you gently split to expose the runny yolk.  Try not to feel like a semi-pro.

Wednesday, May 25, 2011

Upside-down rhubarb cake


I love rhubarb not only because it offers a lovely tangy counterpoint to simple sweetness, delivers a pretty pink, but also because it indicates that spring is finally here.  A humble vegetable, classified as a fruit (I guess an opposite of a tomato), rhubarb's appearance at farmers' stands means that its time for asparagus, spring peas, with strawberries not far behind.  Spring being my favorite time of the year, I appreciate rhubarb's signal.  

While rhubarb pie is a classic, I was in no mood to start pie dough at 10pm on a Sunday.  I was craving a cake with soft crumb that would let the rhubarb flavor come through, not too sweet for a Monday morning  breakfast treat at work, but indulgent enough to have with an afternoon tea.  The Gourmet recipe was just about perfect, but I reduced the sugar in the topping to 1/2 cup,  replace anise with orange zest, and forgot to add the 1/4 cup of milk with no evidence of harm.  My version is below with the link to the original.  The batter comes together in a no time and you don't have to lay out the rhubarb cubes as obsessively as I did.  Also, baking this in a cast iron skillet reduces clean up.  If you don't have an oven proof skillet of the right size, just melt the butter and the brown sugar on the stove top and then pour it into the cake pan.  

Upside-down rhubarb cake
(Adapted, slightly, from Gourmet magazine)

For topping
  • 1/2 stick (1/4 cup) unsalted butter
  • 1/2 cup packed light brown sugar
  • 1 1/2 pounds trimmed rhubarb

For cake
  • Zest of 1 orange, ideally organic, because most of the pesticides are on the skin
  • 1 1/2 cups all-purpose flour
  • 1 1/2 teaspoons baking powder
  • 1 teaspoon baking soda
  • 1/2 teaspoon salt
  • 1 stick (1/2 cup) unsalted butter, softened
  • 2/3 cup granulated sugar
  • 1/2 teaspoon vanilla
  • 2 large eggs
  • 1/2 cup well-shaken buttermilk
  • Make topping:
    In a well-seasoned 10-inch cast-iron skillet melt butter over moderate heat until foam subsides and reduce heat to low. Sprinkle brown sugar evenly onto bottom of skillet and heat, stirring occasionally, until the brown sugar melts. Remove skillet from heat. Cut enough rhubarb crosswise into 1-inch pieces to measure 3 cups and decoratively arrange, rounded sides down, in one layer over brown sugar.

Preheat oven to 350°F.
Make cake:
Into a bowl sift together flour, baking powder, baking soda, and salt. In another bowl with an electric mixer beat together butter and sugar until light and fluffy and beat in vanilla and orange zest. Add eggs 1 at a time, beating well after each addition. With mixer on low speed add flour mixture alternately in batches with buttermilk, beginning and ending with flour mixture and beating until just combined (do not overbeat).| Spoon batter over rhubarb in skillet, spreading evenly (be careful not to disturb rhubarb), and bake cake in middle of oven until golden, about 45 minutes, or until a tester comes out clean. Cool cake in skillet on a rack 15 minutes.


Run a thin knife around edge of skillet and invert a plate over skillet. Keeping plate and skillet firmly pressed together, invert cake onto plate. Carefully remove skillet and serve cake warm or at room temperature. Feel free to share with colleagues.