Thursday, December 23, 2010

The story of the fresh hog, fresh cranberry scones, & bonbons au chocolat

Leigh, the owner of the Bull Run, the farm I receive CSA from, offers a number of specials during the CSA season including opportunities to purchase raw cheese, local honey, and meat. Couple month before Thanksgiving, Leigh sent CSA members an email asking if anyone would be interested in purchasing a whole or a half hog from a local farmer, who raised grass fed hogs. Fear of having to store over 50 pounds of pork in my freezer stopped me from signing up for this deal right away. Within a week, I recruited eight friends with a weakness for good meat to share half a hog. So a day after Thanksgiving, my sister and I hopped on the road to pick up 80 pounds of glorious pork from Fauquier's Finest Country butcher shop, in Virginia. The butcher did an amazing job packing and sorting the meat. All I had to do was to stack the vacuum-sealed meat blocks in my freezer like Tetris.

Instead, I decided to make candy with none of the traditional caramel/toffee mess. The inspiration for the recipe came from store-bought candies that are very popular back home. Based on the reviews I received from my colleagues, these bonbons will soon become popular in the States too.

Dried fruit and nuts bonbons au chocolat
20 dried apricots
20 dried prunes
10 dried figs
20 salted and roasted almonds
20 roasted whole walnuts
20 salted and roasted pistachios
2 tbsp cinnamon
4 lightly crushed cloves
16 oz good quality semi-sweet chocolate

Pre-heat the oven to 250F.
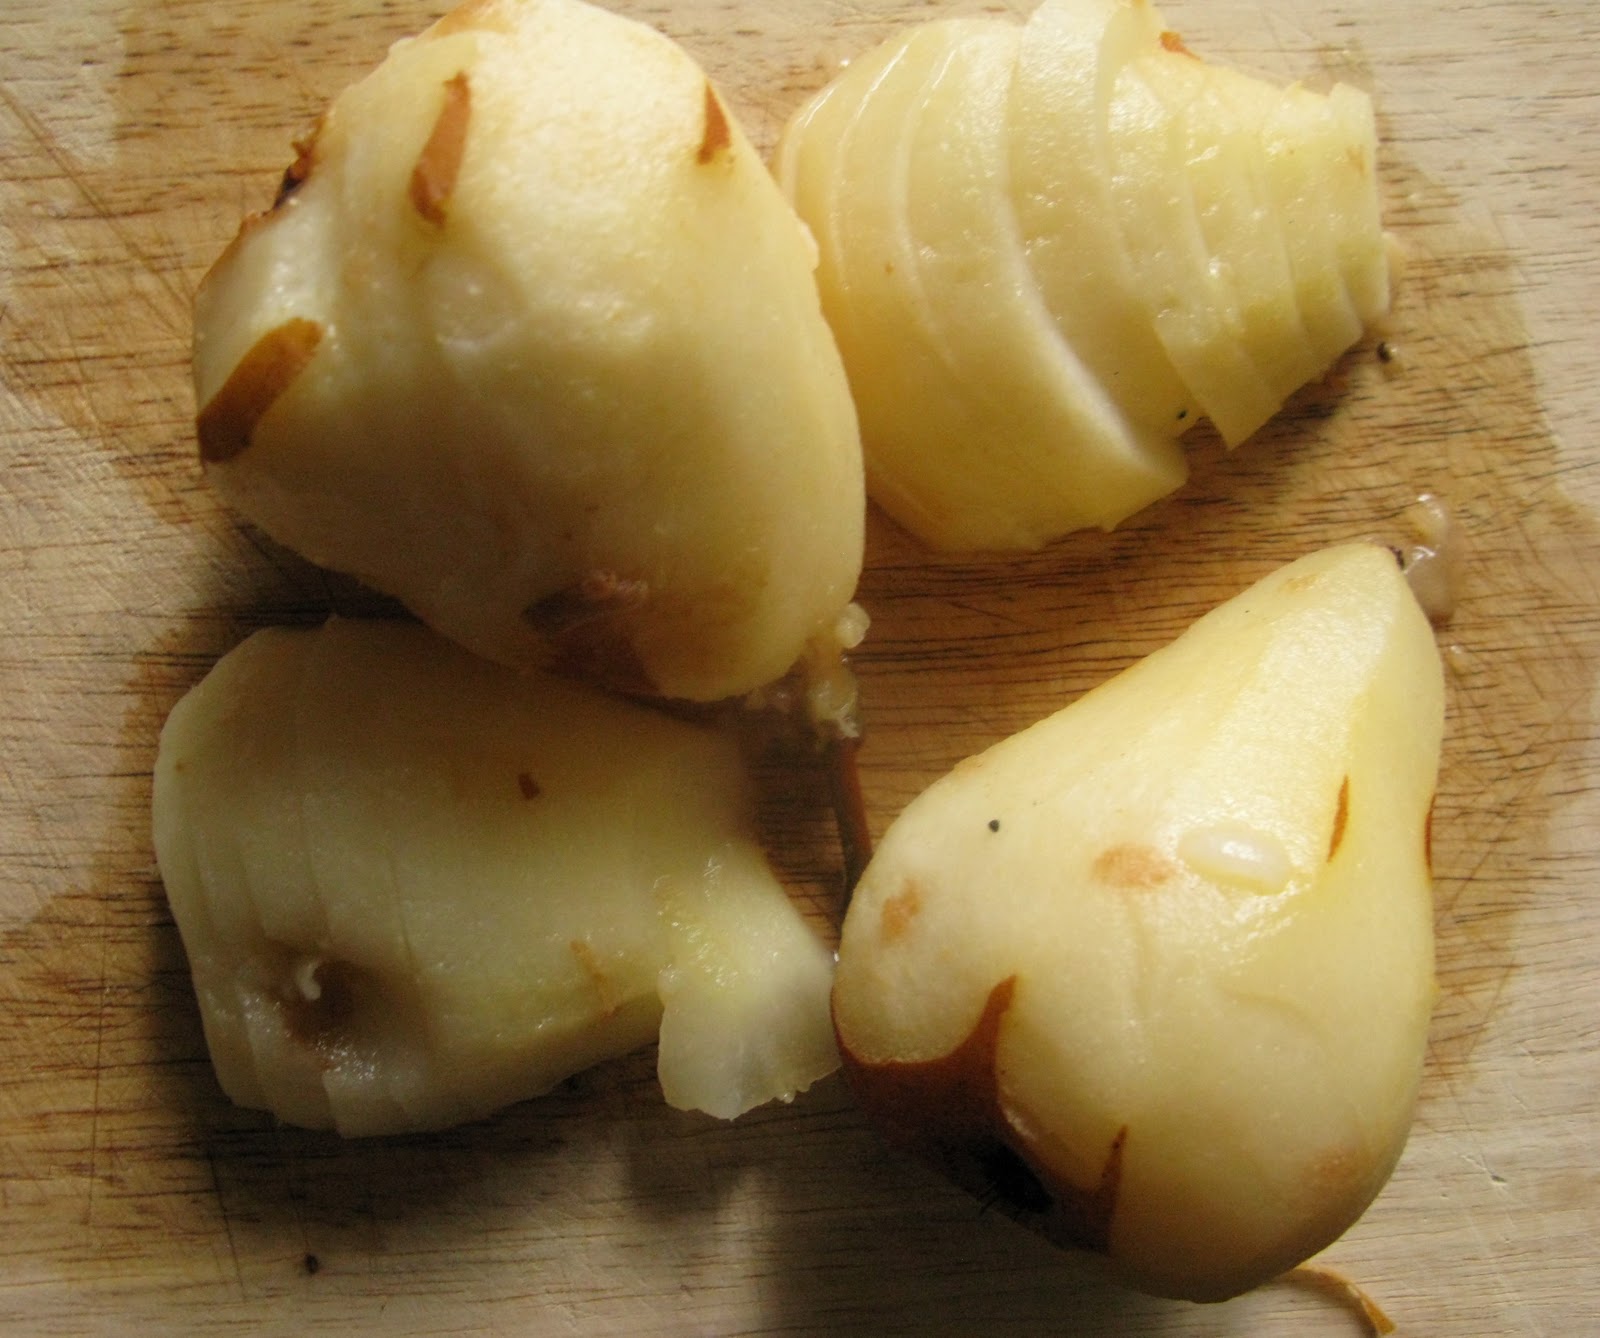
Bring three pots of water to simmer. In the first pot, dissolve the spices and add apricots. In the second pot, add figs and prunes. Simmer for 5-7 minutes until the fruit “puffs” and softens. Remove the fruits from the liquid, spread on the baking sheep, pat dry, and stick in the oven for 5-7 minutes until the skins are dry. Cool the fruits.
In the third pot, melt the chocolate in a water bath stirring constantly with the spatula. Line a large cutting board with a plastic wrap.
Using kitchen scissors make a small cut in each fruit and insert 1-2 nuts inside (I stuffed apricots with almonds, prunes with walnuts, and dates with pistachios).
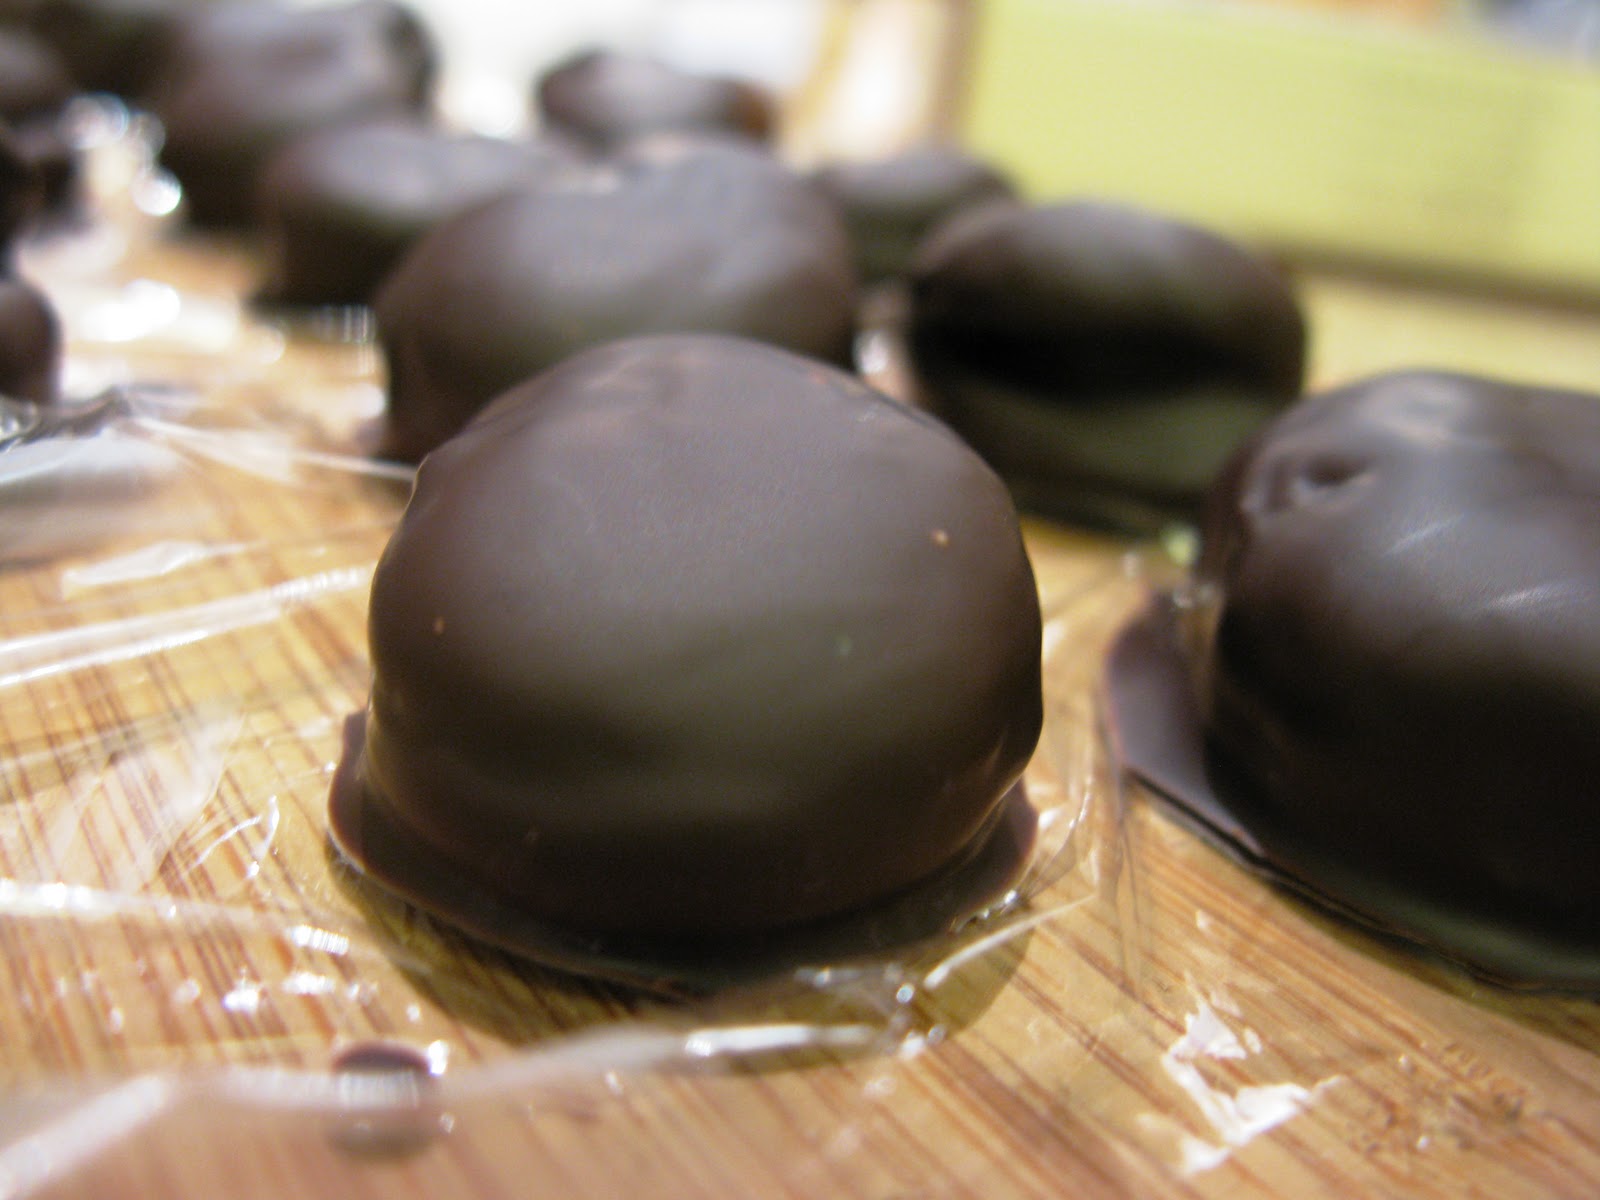
With chopsticks or tweezers, dip each stuffed apricot into the chocolate, making sure the entire fruit is well coated with chocolate. Gently shake off excess chocolate and place the bonbon on the cutting board lined with a plastic wrap. Continue with the rest of the fruit. Refrigerate the bonbons until the chocolate is firm for 15-20 minutes.
Compliment the bonbons with a cup of tea or coffee.

Friday, December 17, 2010

2 sisters + 1 kitchen = 1 Thanksgiving dinner or maybe 2

 As you can see, we served an apple pie for Thanksgiving. The applause for the apple pie goes to my sister, not only because she made the pie, but also because she managed to escape the holiday traffic and successfully deliver the frozen pie dough, turkey serving platter, carving set, and couple bottles of Cava.

Honestly this was the most thoroughly planned holiday meal that we have ever made. In the recent months, work at Artisa Kitchen has made me a slightly obsessive kitchen planner. I planned and cooked two Thanksgiving menus: one for David's family and another one for my dinner party. The planning started about two weeks before the holiday. My sister's reply to the question if she had any specific dishes on her mind was something along the lines, "No, not really. Well, I want to spatchcock the turkey and make the double baked apple pie. Oh also, I have this recipe for a very simple gravy."  To this I replied, "Yeah I am also not sure about the menu. There is a recipe for mashed potatoes in the Happy in the Kitchen that I want to try. And remember that cranberry sauce you made last time? Well I want to make it with quince. U-u-u and the stuffing that you served in Chicago...ohhh that was good". The menu for my dinner party was born.
busy cooks' lunch of smoked duck breast and sauted beet greens with apples
David's menu was born because of the little food brat who lives inside me.   When he told me that he has no idea of what to serve his family on Thanksgiving and most likely it will be something from a can.... no no no! I wanted to make an menu  of dishes that can be prepared in advance and require minimum cleanup. Grilling was the safest choice. I salted the spatchcoked turkey and then rubbed it with herb butter. Sides included grilled fingerling potatoes and winter squash, bacon brussels sprouts, cranberry sauce, and a salad. The meal ended with dolce leche ice cream over a rose poached pairs.


Now back to our table.  Let's start with the turkey, shall we, because that is probably what instills the most fear in budding home cooks.  Oh, and this is Madina taking over the story.  My sister threw around this term, "spatchcock", which is a rather funny word that simply means taking out a bird's backbone and  flattening it.  This technique helps cook the bird more evenly and faster, with our 13 pounder finished is just a little over an hour.  This bird also gave us a good laugh, seeing as it was missing a significant part of its left wing, thus making it our first "right-winged" turkey. The night before Thanksgiving, I mixed kosher salt, chopped herbs (thyme, rosemary, and sage), with black pepper and generously sprinkled the turkey all over.  It rested in the oven till the following afternoon, allowing the salt to draw out some juices, let herb flavor penetrate the meat and improving the meat's texture.  About two hours before dinner, I took the turkey out of the fridge to take the chill off while the oven pre-heated.  Roasted on a flat baking sheet, with some basting, this was one tasty right-winged bird (sorry, couldn't help it!).  

With that, and props to my sister for taking her artistic, slightly OCD nature to decorating the apple pie with hand-carved leaves of pie dough, I will wrap up this post. The recipe for apple pie is coming, I promise.  I just want to get this out before its Christmas, which will bring cookies and a 3-way duck.  I guess we like to have a little fun with our poultry.  

apple pie

beet+pea+simple mashed potatoes
Pea mashed potatoes
4 large Yukon golds
1 cup of frozen peas
handful of basil
3 garlic cloves
1/3 cup of olive oil
1 cup of warm whole milk
white pepper/salt
Peel and cut potatoes in even chunks. If you have a steamer, steam potatoes to reduce the amount of gluten that potatoes will produce. Otherwise, cover potatoes with cold water and bring to boil. Cook until a you can easily pears potato with a knife.

Bring a small pot of water to boil. Fill a large bowl with ice and water. Drop the peas in the boiling water and cook for a minute or two. Strain the peas and immediately put the strainer in the bowl with ice. Place peas, basil, garlic, and olive oil in a food processor or a blender. Blend until the mixture is smooth.

Place potatoes and pea mixture in a double boiler (with a bowl over simmering water). Mash the potatoes adding milk as needed. Adjust salt and pepper.

Beet mashed potatoes
4 large Yukon Golds
2 large beets
1/3 cup of olive oil
1 cup of cream
salt/black pepper
Preheat the oven to 375F. Cut off the beet greens. Wash and dry the vegetables. Place the beets on a sheet of heavy duty foil, pour the olive olive oil over the beets, and cover with foil tightly. Roast in the over for 45 minutes or until beets are cooked through.

With a paper towel remove the beet skins. Cut beet into chunks, add a little more olive oil and pure in a food processor or blender until smooth.

Follow instructions on cooking potatoes and mixing the vegetables from the recipe for the pea mashed potatoes, substituting cream for milk.
Madina's master carving

stuffing stuffed with other food

Michelle Richard's deconstructed egg

Monday, November 29, 2010

The Northern Spy kale salad

One of my favorite food discoveries is Tuscan kale (also known as Dinosaur kale), raw, sliced thinly, and tossed with a bit of lemon juice, olive oil and grated Parmesan cheese. Well, a couple weeks ago I had an improved version of this salad at a lovely restaurant in New York's Lower East Side called Northern Spy.  Ribbons of raw Tuscan kale, roasted acorn squash, almonds and wisps of cheese made for a delicious combination.  Turns out, it is easy to make at home with the goodies from the farmer's market.  Oh, and I love my new silicon baking sheet liners along with Deb's (over at Smitten Kitchen) method of oiling the sheet, not the vegetables.

Kale salad with acorn squash and almonds
1/2 pound of Tuscan kale
1/2 small-medium acorn squash
1/4 cup whole roasted almonds
Juice of 1/2 small lemon
1/4 cup grated Parmesan or Pecorino chees
A healthy glug of olive oil
Salt, pepper

Pre-heat the oven to 450 degrees, cut the squash in half and scoop out the seeds. Slice the squash across into 1/2 inch slices and put them on an oiled baking sheet lined with foil or silicon mats, if you would like. Season gently with salt and roast, flipping over halfway, for about 20-25 minutes until soft and browned.  Meanwhile, remove the ribs from the kale and slice across very thinly.  Finely dice the shallot and coarsely chop the almonds.  Slightly cool the roasted squash and cut it into 3-4 pieces per slice.  Toss the kale, squash, shallot, and almonds with the juice of 1/2 lemon, most of the grated cheese, a couple tablespoons of olive oil and salt and pepper.  Pile on a plate and top off with the remaining cheese.  Enjoy as a salad or a lovely seasonal side dish.

Sunday, November 21, 2010

Baked ricotta rolls - a random name for a really good dish

Dear friends (well, those who read this blog), I've missed you! I've been away for far too long and out of the many reasons, one really stands out - I've been cooking boring food that I did not deem worth sharing.  For me, the boring (but good!) foods are fried ham with eggs, all manners of roasted vegetables (450 degree oven, salt, pepper, olive oil, maybe cumin or paprika, lemon juice to finish), lentil soup. Yeah, I want to fall asleep reading this too.  At some point, though,  I had to write something, so I give you a dish that is simple, but not boring, easy, yet makes for an impressive dinner and excellent leftovers.  It has no good name (feel free to suggest in comments), but I love it nonetheless.  This week, especially, as you anticipate swimming in turkey, mashed potatoes, and squash, the baked ricotta rolls maybe a reprieve,  a connection to another place and, frankly, an entirely different season.  Soft ricotta, fresh herbs, and a little pasta baked in tomato sauce.

These rolls do not follow a seasonal philosophy. They shamelessly use canned tomatoes and I'm sure would be delicious made with fresh tomatoes in the middle of August.  However, I accidentally made ricotta by overheating my yogurt mixture last week, so I just pretended that it was the middle of August now.  I made this batch with basil, but any soft herb (parsley, chives, even thyme) would be good.

Baked ricotta rolls
2 cups of ricotta cheese
8 dried lasagna sheets
1 28-oz can of whole peeled tomatoes in juice, crushed with your hands
3 cloves of garlic
1 cup of grated Parmesan cheese, divided
1 cup of basil or parsley, chopped and divided, plus whole leaves for baking
Salt, pepper, olive oil, nutmeg

Preheat the oven to 350 degrees, put a medium pot of water on heat to bring to the boil, and start heating a large saute pan for the tomato sauce.  Peel and lightly crush 2 of the garlic cloves, drop them in the pan to be used for the tomato sauce, and saute them in a couple of tablespoons of olive oil over medium heat. When both sides of the garlic have gotten a golden brown color, add the tomatoes (watch for splatter) and let the sauce simmer for 15-20 minutes until slightly thickened.  Stir in salt, pepper, and 1/2 cup of basil.

Your pasta water should be boiling by now.  Salt it well and add 8 sheets of lasagna pasta, stirring to prevent sticking. Cook for 8-9 minutes, or until cooked enough to be pliable, but not fully cooked. Take the pasta out of water and let rest, separated from each other, on a plate (pasta sheets will want to stick).

Mix ricotta cheese with 1/2 cup of Parmesan, a finely chopped remaining clove of garlic, and remaining basil, salt, pepper, and a few swipes of freshly-grated nutmeg.  Position the lasagna sheets a short end in front of you.  Put 2-3 tablespoons of filling on one end of the sheet, then roll gently.  Pour the tomato sauce into a baking dish and nestle the pasta rolls into the sauce.  Top the rolls with 1/2 cup of Parmesan and put a basil leaf on each roll, if you would like.  Bake, covered for 20-25 minutes.  Then uncover and broil for a few minutes until the cheese is bubbling and lightly toasted.  Let cool for 5 minutes, serve and enjoy, perhaps with that boring roasted broccoli.

Monday, November 1, 2010

Cook's Illustrated Pissaladière-Onion, Olive & Anchovy Tart

I was flipping through a pile of old Cook's Illustrated at my sister's. Among other reason that make Cook's Illustrated superior to other culinary publications is the fact that there is always a recipe that you want to make right away. Pissaladière was the one that I ran into. Pissaladière is a simple french staple that can be served for simple dinner, brunch, or a wine paring event. To me it feels that the dish should be accompanied by a vegetable or a green, which, in my case, was a bed of arugula with shaved Pecorino and thin slices of the celery root. Simply blanched green beans or lightly roasted carrots should also compliment the salty and buttery taste of Pissaladière well. A glass of local 2007 Syrah from Delaplane Cellars is was a great pairing. 
Dough
2 cups of bread flour and about 1/2 cup for rolling and shaping
1 teaspoon instant yeast
1 teaspoon Kosher salt
1 tablespoon olive oil and another 2 teaspoons of olive oil for brushing and shaping the dough
1/2 cup hot water mixed with 1/2 cup room temperature water
Mix all dry ingredients with oil. Pour in water in three batches mixing gently until the dough forms a ball.
With well floured hands transfer the dough into a floured board and knead for 3-5 minutes until the dough becomes smooth.
Oil a large bowl or a 32 ounce (minimum) tupperware. Place the dough in a bowl/tupperware, roll around once to cover all of the dough with oil, and cover with a plastic wrap/top. Let the dough rise in a draft free place for an hour or leave it overnight in a refrigerator.
Onions
2 tablespoons olive oil from anchovies
4 large Vidalia onions, diced into 1/2 inc pieces (4 cups)
1/2 teaspoon Kosher salt
1 teaspoon brandy/cognac
1 tablespoon water
Heat the oil on a medium heat in a non-stick or cast iron pan. 
Add onions and salt. Cook for 10 minutes until onions start to brown.
Add brandy/cognac and let the alcohol evaporate. Lower the heat, add water, and cook stirring every 5 minutes for another 20 minutes until onions become golden brown.

the steps of Delaplane Cellars http://www.delaplanecellars.com/
Toppings
1/2 cup black pitted olives, roughly chopped
8 anchovy fillets packed in oil, roughly chopped plus 9-10 additional anchovy fillets
thinly sliced green onions (optional)
Preheat the oven to 500F.
Once the dough doubles, with well oiled hands remove the from the container, and divide into 2 equal parts, leaving one in a container while you are shaping the other. 
Shape the dough by pulling and folding the edges of the dough ball in the center. Imagine you are folding chamomile petals.
Flip the dough seam side down and start stretching it by pressing and pulling it with a palm of one hand while holding the other end. Add flour if the dough sticks. Lay on a baking sheet or a pizza stone sprinkled with corn meal or lined with a parchment papper. Repeat with the second piece of dough.
Brush the dough with olive oil. 
Scatter onions, olives, chopped and anchovies. Layer anchovy fillets.
Bake until edges of the dough become golden brown about 15-17 minutes.
Cool and sprinkle with green onions.


Tuesday, October 12, 2010

Elements of the weekend: sustainable eating and birthday pear tart

In the past couple year, I have been increasingly using local seasonal produce from community supported agriculture (CSA) ran by the Bull Run Mountain Farm. Leigh Hauter, the owner of the farm, is one of the most wonderful CSA providers in D.C. area. He always delivers exceptional organic fruits and vegetables along with fresh eggs and honey. Few times a season, shareholders also can order 5-pounds of raw Cheddar or Colby cheese, and visit the Farm for a shareholders party, cider pressing, and gleaning. I could not miss an opportunity to make some fresh cider. Here is the video of me pressing cider and links to the farms' websites.
Information on CSA http://bullrunfarm.com/
Website of the dairy farm http://www.farmsteadfresh.com/

In addition to the traditional apple cider, we made some pear cider, which was absolutely divine. I saved few pears to make an almond pear tart for my dear friend Amina’s birthday.
Almond-pear tart
Tart shell:
1 1/2 cups all-purpose flour
¼ cup agave
1/4 teaspoon salt
9 tablespoons of frozen unsalted butter, cut into small cubes or grated
1 large egg yolk
Put the flour, sugar and salt in the bowl and mix using 2 forks until the flour mixture mixes with butter forming coarse meal the size of oatmeal. Mix in the yolk until it blends in forming clumps. Turn the dough on the counter and gently form a ball, then knead carefully. Wrap the dough in plastic and refrigerate for couple hours.

After the dough chilled for 2 hours move it to well-floured surface. I am lucky to have stone countertop that keeps the dough cool longer. Butter an 8-inch tart pan with a removable bottom. Lift the dough to prevent sticking. Roll on half of the dough on the rolling pin and move to the pan. Press the dough carefully intol the pan sealing the edges. If the dough is bigger than a pan press the extra dough into the edges to make them firmer. Generously pierce the crust with fork.

Cover the crust tightly with non-stick aluminum foil and freeze for at least an hour.

Preheat the oven to 375°F and bake the crust for 25 minutes on the middle rack. Remove the foil and bake the crust for another 5 minutes. Cool the crust on a rack.

Filing:
2 cups dessert wine
½ cup agave
1 1/2 tablespoons fresh lemon juice
3 firm but ripe pears, peeled, cut in a half vertically, and cored

1 ½ cup almond meal
2 tablespoon all purpose flour
1 ounce agave
1 ½ stick room temperature butter
2 large eggs
1 teaspoons brandy
1 teaspoon almond extract
Powdered sugar (optional)
Bring wine, agave, and lemon juice to simmer. Add pears and cover the pot. Simmer for 15-20 minutes until pears look soft and translucent. Cool pears in syrup (reserve the syrup to top vanilla ice cream) Once pears are cool, cut the pear halves into ½ inch thick half rounds keeping the shape of half a pear together.

Mix almond meal, flour, and butter. Slowly mix in agave, eggs, brandy, and almond extract.

Spread the filling evenly in the crust. Carefully lift the pear halves using a large knife as a shelf and place in the filling so the top part of the pear point in the center. Gently press the pear on an angle, so the pieces will fan out.

Bake the tart for 55 minutes or until a toothpick comes out clean. Cool tart in the pan on rack. Sift powdered sugar the bottom of the shell, and serve.

Tuesday, September 28, 2010

Indian vegetarian food from a Kazakh kitchen


For the longest time, I had a big aversion to cilantro and its relative, lovage, which is used as cilantro in all of Central Asia.  Both herbs tasted like soap and I could not come up with a better way to ruin a dish than to add cilantro or lovage to it.  Fortunately, through years of dedicated practice (riiiight), I came to see cilantro for what it is - a lovely way to add brightness to a dish.  Now, I can't imagine either Baigan Bharta or Chana Masala in this post without a generous handful of cilantro. It adds freshness to cooked spices, bringing them out of the doldrums and back into life.

The Chana Masala, courtesy of Orangette is a staple in my house, a perfect easy meal pulled together from pantry staples and trusted spices, comfort at the end of the day.  The Baigan Bharta has long been an obsession, but I disliked the greasy version often found in take-out.  Fortunately, with the eggplant season still in full swing, I've had plenty of time to experiment with multiple recipes and find the one that I liked.  My mom especially loves this dish and has been a content Kazakh tucking into Indian vegetarian food.

Baigan Bharta
1 medium - large eggplant
1 medium tomato
2 cloves of garlic
1 medium onion
1/2 inch knob of ginger
1 medium jalapeno or 1/2 teaspoon of cayenne
2 - 3 tablespoons of olive oil or ghee
1/2 teaspoon of black mustard seeds
1/2 teaspoon of cumin seeds
1/2 teaspoon of ground coriander
1/2 teaspoon of turmeric
1/2 teaspoon of chili powder
1 teaspoon of garam masala
Sale to taste and a generous handful of cilantro to finish

Preheat the oven to 400 degrees.  Wash the eggplant and prick it all over with a fork or a tip of a knife. Roast it (I like lining the baking sheet with foil for easy clean-up) for 45 minutes or until it is soft and sort of collapses into itself.

Meanwhile, heat up a large deep skillet with a couple of tablespoons of oil or ghee over low-medium heat.  Chop the onion and tomato into cubes, finely chop garlic, ginger and jalapeno, if using.  Drop the onion in the pan and fry until it starts turning golden, then add the garlic, ginger, and jalapeno.  Fry for another minute or so, until your kitchen starts smelling like the promise of dinner.  Add another tablespoon of oil and fry the spices for a minute also, moving them around, so that they do not burn until fragrant.  Drop in the tomato, letting it release its juice for a couple of minutes.  Add a couple tablespoons of water, cover, and simmer on low heat for 5-10 minutes to let flavors become friendly.  

Once the eggplant has reached its collapsed state, carefully take it out and let cool, so that you can handle it.  Once cooled, split it in half and scoop out the flesh with a large spoon onto a big cutting board.  Run your knife through the seedy flesh, further breaking down the fibers.  Note how strong eggplant skin is.

Add the eggplant to the pan, mix well and let cook for another 10 minutes under the lid.  Season well with salt and stir in plenty of cilantro.  If you hate cilantro, try a bit of mint or green onion.  Serve with rice and Chana Masala.


Tuesday, September 14, 2010

Vareniki, granola, and apple bread

Our mom is in the States for 3 months. She spends most of her time in NYC, so I don’t get as many goodies as my sister does. During this week when she was visiting, I tried to squeeze in as many dishes that we wanted to exchange on the menu. One of the things that I miss the most about mom’s cooking, is hand-rolled pasta dough and 10,000 dishes she uses it for. We made a slightly gourmet version of vareniki, traditional Ukrainian ravioli, apple bread, and granola. I made some tweaks to the apple bread recipe from smittenkitchen.com and staple granola recipe substituting sugar for agave.
Apple bread: substitute a cup of oil and sugar for ½ cup of oil and ½ of agave.

Granola:
4 cups of regular oats
generous pinch of salt
1/3 cup of agave
1/3 cup of vegetable oil
3 cups of assorted chopped nuts, seeds, and dry fruits. I used walnuts, sunflower seeds, dried apricots, and raisins.
Bring the oven to 300F. Mix oats, salt, agave, and oil.Spread the mixture evenly on a cookie sheet or non-alumni baking sheet. When using alumni baking sheet cover it with parchment paper, because aluminum might alter the taste of some foods.
Bake for 1 hour. Mix in nut, seed, and fruit mixture and bake for another 15 minutes. Cool on a wire rack. Refrigerate in a closed container for up to 2 weeks.
Dough
1.5 – 2 cups of white flour
pinch of salt
1 egg
1 cup (at the most) of tepid water
Mix 1.5 cup of flour and salt. Make an indentation in the flour mixture and add the egg. Mix in the egg breaking it gently. Start adding water a little bit at the time and mix it in. Add enough water to form a dough. Knead the dough on a floured surface until it becomes soft and elastic adding flour and water if needed for about 3-5 minutes. Cover the dough with a bowl or plastic wrap and let it rest for 10-15 minutes.
Uncover the dough and knead for another 3-5 minutes. The dough should be very easy to
work with and should not be sticky. Split the dough into 2 balls. Cover one, while you roll out the other into a 1/6 inch thick disk.
Cut into circles of dough using a cookie cutter or a glass. Cover the sheets with a towel to prevent drying out.
Filling
2 medium size yellow squash
2 medium size russet potatoes, skins removed
salt/pepper to taste
olive oil
Preheat the oven to 400F. Split squashes in a half forming boats. Brush squash with olive oil, sprinkle salt/pepper, and bake for 30 minutes. Bring a pot of salted water and boil potatoes for 20 minutes.
Scoop out the flesh of squash, strain potatoes, and mash with a little olive oil until smooth. Using immersion blender makes this a little easier. Adjust salt and pepper.
Assembling
Take a dough circle, place about a teaspoon of filling on one side and close the pocket. Place vareniki on a floured surface until you assemble all of them.
Bring a large pot of salted water to boil and carefully drop vareniki. Boil on high heat until vareniki start floating on surface. Scoop out carefully.
Eat right away with a little butter, pesto, or any other light and herb sauce.

Monday, August 23, 2010

Corn soup for mom

Quick, go out to the market now and get fresh corn before its too late. Yes, yes, I know, there is frozen corn year around, but then you won't be able to extract the wonderful corniness (yes, I consider that a word) out of the cobs.  Our mom is visiting now and I really wanted her to try the true essence of the sweet New Jersey corn.  Hence, a simple, creamy, soothing corn soup. This soup barely needs anything beyond corn, a knob of butter, a little cream, and a few shallots or small onions, which makes it perfect for warm Wednesday evening after I've been staring at the sun from the office window.

The dinner was complete with crusty bread and a salad of local tomatoes and mozzarella.  There is really no good reason to mess with summer market produce.

Fresh corn soup
6 cobs of fresh corn
8 cups of water
2 medium shallots, chopped
2 tablespoons of unsalted butter
2-3 tablespoons of cream or creme frache
Salt and pepper

Remove the corn husks and cut the kernels of the cobs.  Bring the corn cobs and water to the boil in a large pan and simmer for 20-30 minutes to make a quick corn stock.  Feel free to scrape the cobs a bit with a spatula to extract some of that corn "milk".

Meanwhile, melt the butter in a medium saucepan and saute the shallots over medium-low heat until soft, but not browning.  Add the corn kernels and let them toast a bit in the butter with a touch of salt.  Pour in the stock, bring to the boil and simmer for l5-20 minutes until the corn is tender and sweet. The only thing you don't want to do with this soup is overcook the corn, which can become starchy instead of sweet.

Off the heat, puree the soup in a blender or with a hand blender.  Please be careful when blending hot liquids; it is best done in batches.  Set a strainer over a large bowl and strain 2/3 of the soup, pressing down on the corny solids.  I like to keep some of the soup not strained for a bit of texture.  Return the soup to low heat, stir in 2-3 tablespoons of cream or creme frache, and season to taste with salt and a bit of pepper.  The 30 minutes I spent making the soup were perhaps the most gratifying in my day.

Thursday, August 19, 2010

Summer cannelloni stew and smitten hamantaschen cookies


Beans (skip this if using canned beans):
4 cups of dried cannelloni beans
10-12 cups of water
1 TBSP Kosher salt
1 head of garlic, peeled
1 springs of sage

Rinse beans and cover with water. Soak beans for at least 12 hours.
Rinse beans again. Bring a pot of water to boil. Add beans and remaining ingredients.
Simmer beans in a covered pot for 30 minutes. Open the lid and simmer for another 15-30 minutes until beans a soft, but don't fall apart.
Remove beans from the pot reserving 2 cups of bean water and discard sage with garlic.

Stew
1 TBSP olive oil
2 ounces of cubed guanciale or prosciutto or smoked bacon
3 medium or 2 large carrots piled if skin is thick and chopped into small rounds or half rounds
4 cups of cannelloni beans
Salt and pepper to taste

Heat the oil (I use the same pot that I made beans in) and add meat. Lower the heat to medium low and cover the meat letting the fats melt.
Once the fats melted increase the heat and add carrots and saute for 2-3 minutes until carrots are caramelized.
Mix in the beans and saute for another minute or so.
Add reserved bean water and lower the heat to simmer.
Let the stew simmer uncovered for about 10 minutes until the liquid thickens.
If you like heartier stew mash the beans lightly with a potato masher.

Serve with toasted dark bread and good beer.
Recipe for cookies can be found at http://smittenkitchen.com/2008/03/hamantaschen/

Wednesday, August 11, 2010

Fresh cranberry beans with summer pistou

I can't pass a farmers' market without buying something. Last week I got lucky and snagged a tangle of fresh cranberry beans, still in their pods, a few quick steps away from dinner. Fresh beans cook in 20 - 25 minutes and certainly don't need soaking. At the same stand, I grabbed some parsley and arugula, thinking a quick pistou would be a lovely foil for the beans. We ate the beans with a big arugula salad and some homemade meatballs that mom made.

Fresh cranberry beans with summer pistou
Serves 2 -4, depending on what else is for dinner
1.5 pounds of fresh cranberry beans to make about 1 pound shelled
A good fistful of parsley
1-2 cups of arugula
1 garlic clove
Hard cheese, like Parmesan, finely grated
Juice of 1/2 lemon
Olive oil, salt, pepper

Bring a medium pot of water to the boil and shell the beans by pulling on the string at one side meanwhile. Salt the water generously and add the beans. Taste them after 20 minutes; drain if tender or let cook for another 5 minutes or so. Meanwhile, make the pistou. I make mine using a mortar and pestle, but you can use a small food processor. If you decide to use a mortar and pestle, chop the parsely and arugula and the garlic finely, then pound in the mortar, adding salt, pepper, grated Parmesan cheese, juice of 1/2 lemon and 1/4 cup of olive oil. If making in the food processor, just let the machine blitz it all together. Either way, taste to make sure you like it.
By now, the beans should be tender but not mushy. Mix the drained beans with the pistou, taste to see if additional cheese, salt, or pepper are needed and serve.

Wednesday, August 4, 2010

Pickled/preserved lemons


I ended up with 20 lemons because they were on sale. Almost immediately I started to crave a braised chicken with olives and preserved lemons ( this is actually what I want NOW instead of the salmon that's baking in the oven). Good food required patience. It takes about 2-3 days to pickle lemons, which means for the next couple days I will be thinking about the braised chicken every time I rotate the jar with lemons.

Pickled/preserved lemons
1 tsp of kosher salt per lemon
1 tsp of lightly crushed black paper corns  
glass jar with a lid

Wash and put the jar in a 225F oven for about 20 minutes to sterilize it. Meanwhile was and dry lemons.
Cut lemons vertically into 4 equal slices keeping slices attached to each other at the bottom and creating a flower shape. I cut lemons on a plate not to waste lemon juice.
Salt each lemon inside and out.  Take the jar out of the oven and sprinkle 1 teaspoon of salt on the bottom of the jar. Pack lemons in the jar and add pepper with reserved lemon juice. Close the lid tightly. If the jar is not at least 3/4 filled with lemon juice add more juice.
Keep the jar at a room temperature and turn on a daily basis coating each lemon with the juice for next 2-3 days. 

After opening, lemons stay fresh  refrigerated for 3 months.

Thursday, July 29, 2010

Aunt Mariam's Orangette

I never toss away orange and grapefruit peal, because I either make a citrus spice mix for hot chocolates and red wine sauces by drying and grinding the peels or a cut them into thicker slices and freeze to make orangettes. I learned this trick from my aunt Mariam, who adds dried orange peels to her Iranian dishes. Aunt Mariam is also a fan of a small chocolate treat in the afternoon that’s why we both share love for orangettes.

Aunt Mariam’s Orangette
1 cup of 2” orange and/or grapefruit peels
4 cups of boiling water
¾ cup of agave or 1 cup of sugar
1 cup of water
32 ounces unsweetened chocolate or 32 ounces of sweetened chocolate of your preference¾ cup of agave (skip if using sweetened chocolate)
½ cup of unsweetened coco powder (optional)
Heat a kettle of water to speed up the process.
Place citrus peels in the boiling water and blanch for 2 minutes. Drain water and rinse peels. Repeat.
Combine agave and water in a pot and bring the mixture to simmer. Add peels, cover, and simmer for 1 hour.
Drain agave syrup in a glass container and place peels in a rack to cool and dry for about 15 minutes. Place a baking sheet under the rack for easy clean-up and reserve agave syrup for a ginger lemonade, margaritas, and poached fruit. The syrup stays fresh for about 2 weeks.
While peels are drying, melt the chocolate*.
Using chopsticks dip each peel in melted chocolate and place back on the rack.Orangettes stay fresh refrigerated for about 3 weeks in all-tight container**
Dust orangettes with cocoa powder. Once all peels are covered in chocolate place the rack in the fridge for 10 minutes or until the chocolate is firm.
** make sure to make them for your aunt.