Thursday, December 23, 2010

The story of the fresh hog, fresh cranberry scones, & bonbons au chocolat

Leigh, the owner of the Bull Run, the farm I receive CSA from, offers a number of specials during the CSA season including opportunities to purchase raw cheese, local honey, and meat. Couple month before Thanksgiving, Leigh sent CSA members an email asking if anyone would be interested in purchasing a whole or a half hog from a local farmer, who raised grass fed hogs. Fear of having to store over 50 pounds of pork in my freezer stopped me from signing up for this deal right away. Within a week, I recruited eight friends with a weakness for good meat to share half a hog. So a day after Thanksgiving, my sister and I hopped on the road to pick up 80 pounds of glorious pork from Fauquier's Finest Country butcher shop, in Virginia. The butcher did an amazing job packing and sorting the meat. All I had to do was to stack the vacuum-sealed meat blocks in my freezer like Tetris.

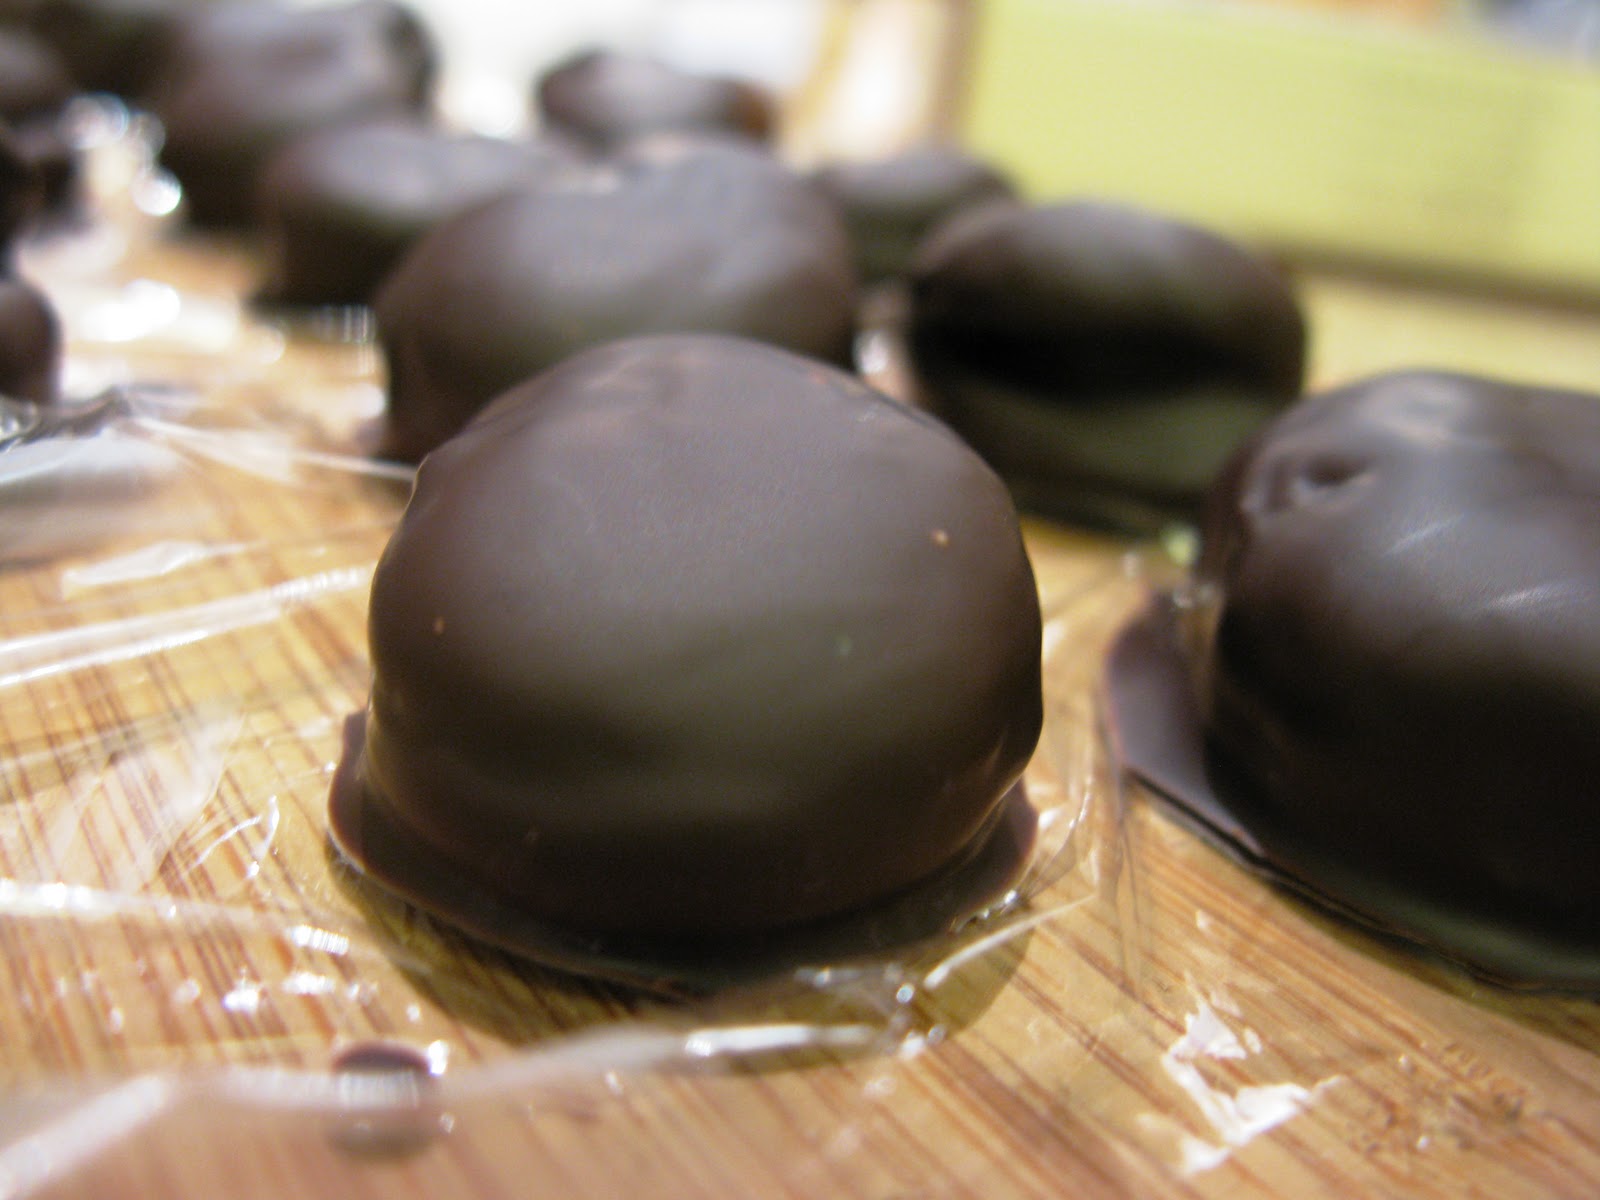
Instead, I decided to make candy with none of the traditional caramel/toffee mess. The inspiration for the recipe came from store-bought candies that are very popular back home. Based on the reviews I received from my colleagues, these bonbons will soon become popular in the States too.

Dried fruit and nuts bonbons au chocolat
20 dried apricots
20 dried prunes
10 dried figs
20 salted and roasted almonds
20 roasted whole walnuts
20 salted and roasted pistachios
2 tbsp cinnamon
4 lightly crushed cloves
16 oz good quality semi-sweet chocolate

Pre-heat the oven to 250F.
Bring three pots of water to simmer. In the first pot, dissolve the spices and add apricots. In the second pot, add figs and prunes. Simmer for 5-7 minutes until the fruit “puffs” and softens. Remove the fruits from the liquid, spread on the baking sheep, pat dry, and stick in the oven for 5-7 minutes until the skins are dry. Cool the fruits.
In the third pot, melt the chocolate in a water bath stirring constantly with the spatula. Line a large cutting board with a plastic wrap.
Using kitchen scissors make a small cut in each fruit and insert 1-2 nuts inside (I stuffed apricots with almonds, prunes with walnuts, and dates with pistachios).
With chopsticks or tweezers, dip each stuffed apricot into the chocolate, making sure the entire fruit is well coated with chocolate. Gently shake off excess chocolate and place the bonbon on the cutting board lined with a plastic wrap. Continue with the rest of the fruit. Refrigerate the bonbons until the chocolate is firm for 15-20 minutes.
Compliment the bonbons with a cup of tea or coffee.

Friday, December 17, 2010

2 sisters + 1 kitchen = 1 Thanksgiving dinner or maybe 2

 As you can see, we served an apple pie for Thanksgiving. The applause for the apple pie goes to my sister, not only because she made the pie, but also because she managed to escape the holiday traffic and successfully deliver the frozen pie dough, turkey serving platter, carving set, and couple bottles of Cava.

Honestly this was the most thoroughly planned holiday meal that we have ever made. In the recent months, work at Artisa Kitchen has made me a slightly obsessive kitchen planner. I planned and cooked two Thanksgiving menus: one for David's family and another one for my dinner party. The planning started about two weeks before the holiday. My sister's reply to the question if she had any specific dishes on her mind was something along the lines, "No, not really. Well, I want to spatchcock the turkey and make the double baked apple pie. Oh also, I have this recipe for a very simple gravy."  To this I replied, "Yeah I am also not sure about the menu. There is a recipe for mashed potatoes in the Happy in the Kitchen that I want to try. And remember that cranberry sauce you made last time? Well I want to make it with quince. U-u-u and the stuffing that you served in Chicago...ohhh that was good". The menu for my dinner party was born.
busy cooks' lunch of smoked duck breast and sauted beet greens with apples
David's menu was born because of the little food brat who lives inside me.   When he told me that he has no idea of what to serve his family on Thanksgiving and most likely it will be something from a can.... no no no! I wanted to make an menu  of dishes that can be prepared in advance and require minimum cleanup. Grilling was the safest choice. I salted the spatchcoked turkey and then rubbed it with herb butter. Sides included grilled fingerling potatoes and winter squash, bacon brussels sprouts, cranberry sauce, and a salad. The meal ended with dolce leche ice cream over a rose poached pairs.


Now back to our table.  Let's start with the turkey, shall we, because that is probably what instills the most fear in budding home cooks.  Oh, and this is Madina taking over the story.  My sister threw around this term, "spatchcock", which is a rather funny word that simply means taking out a bird's backbone and  flattening it.  This technique helps cook the bird more evenly and faster, with our 13 pounder finished is just a little over an hour.  This bird also gave us a good laugh, seeing as it was missing a significant part of its left wing, thus making it our first "right-winged" turkey. The night before Thanksgiving, I mixed kosher salt, chopped herbs (thyme, rosemary, and sage), with black pepper and generously sprinkled the turkey all over.  It rested in the oven till the following afternoon, allowing the salt to draw out some juices, let herb flavor penetrate the meat and improving the meat's texture.  About two hours before dinner, I took the turkey out of the fridge to take the chill off while the oven pre-heated.  Roasted on a flat baking sheet, with some basting, this was one tasty right-winged bird (sorry, couldn't help it!).  

With that, and props to my sister for taking her artistic, slightly OCD nature to decorating the apple pie with hand-carved leaves of pie dough, I will wrap up this post. The recipe for apple pie is coming, I promise.  I just want to get this out before its Christmas, which will bring cookies and a 3-way duck.  I guess we like to have a little fun with our poultry.  

apple pie

beet+pea+simple mashed potatoes
Pea mashed potatoes
4 large Yukon golds
1 cup of frozen peas
handful of basil
3 garlic cloves
1/3 cup of olive oil
1 cup of warm whole milk
white pepper/salt
Peel and cut potatoes in even chunks. If you have a steamer, steam potatoes to reduce the amount of gluten that potatoes will produce. Otherwise, cover potatoes with cold water and bring to boil. Cook until a you can easily pears potato with a knife.

Bring a small pot of water to boil. Fill a large bowl with ice and water. Drop the peas in the boiling water and cook for a minute or two. Strain the peas and immediately put the strainer in the bowl with ice. Place peas, basil, garlic, and olive oil in a food processor or a blender. Blend until the mixture is smooth.

Place potatoes and pea mixture in a double boiler (with a bowl over simmering water). Mash the potatoes adding milk as needed. Adjust salt and pepper.

Beet mashed potatoes
4 large Yukon Golds
2 large beets
1/3 cup of olive oil
1 cup of cream
salt/black pepper
Preheat the oven to 375F. Cut off the beet greens. Wash and dry the vegetables. Place the beets on a sheet of heavy duty foil, pour the olive olive oil over the beets, and cover with foil tightly. Roast in the over for 45 minutes or until beets are cooked through.

With a paper towel remove the beet skins. Cut beet into chunks, add a little more olive oil and pure in a food processor or blender until smooth.

Follow instructions on cooking potatoes and mixing the vegetables from the recipe for the pea mashed potatoes, substituting cream for milk.
Madina's master carving

stuffing stuffed with other food

Michelle Richard's deconstructed egg

Monday, November 29, 2010

The Northern Spy kale salad

One of my favorite food discoveries is Tuscan kale (also known as Dinosaur kale), raw, sliced thinly, and tossed with a bit of lemon juice, olive oil and grated Parmesan cheese. Well, a couple weeks ago I had an improved version of this salad at a lovely restaurant in New York's Lower East Side called Northern Spy.  Ribbons of raw Tuscan kale, roasted acorn squash, almonds and wisps of cheese made for a delicious combination.  Turns out, it is easy to make at home with the goodies from the farmer's market.  Oh, and I love my new silicon baking sheet liners along with Deb's (over at Smitten Kitchen) method of oiling the sheet, not the vegetables.

Kale salad with acorn squash and almonds
1/2 pound of Tuscan kale
1/2 small-medium acorn squash
1/4 cup whole roasted almonds
Juice of 1/2 small lemon
1/4 cup grated Parmesan or Pecorino chees
A healthy glug of olive oil
Salt, pepper

Pre-heat the oven to 450 degrees, cut the squash in half and scoop out the seeds. Slice the squash across into 1/2 inch slices and put them on an oiled baking sheet lined with foil or silicon mats, if you would like. Season gently with salt and roast, flipping over halfway, for about 20-25 minutes until soft and browned.  Meanwhile, remove the ribs from the kale and slice across very thinly.  Finely dice the shallot and coarsely chop the almonds.  Slightly cool the roasted squash and cut it into 3-4 pieces per slice.  Toss the kale, squash, shallot, and almonds with the juice of 1/2 lemon, most of the grated cheese, a couple tablespoons of olive oil and salt and pepper.  Pile on a plate and top off with the remaining cheese.  Enjoy as a salad or a lovely seasonal side dish.

Sunday, November 21, 2010

Baked ricotta rolls - a random name for a really good dish

Dear friends (well, those who read this blog), I've missed you! I've been away for far too long and out of the many reasons, one really stands out - I've been cooking boring food that I did not deem worth sharing.  For me, the boring (but good!) foods are fried ham with eggs, all manners of roasted vegetables (450 degree oven, salt, pepper, olive oil, maybe cumin or paprika, lemon juice to finish), lentil soup. Yeah, I want to fall asleep reading this too.  At some point, though,  I had to write something, so I give you a dish that is simple, but not boring, easy, yet makes for an impressive dinner and excellent leftovers.  It has no good name (feel free to suggest in comments), but I love it nonetheless.  This week, especially, as you anticipate swimming in turkey, mashed potatoes, and squash, the baked ricotta rolls maybe a reprieve,  a connection to another place and, frankly, an entirely different season.  Soft ricotta, fresh herbs, and a little pasta baked in tomato sauce.

These rolls do not follow a seasonal philosophy. They shamelessly use canned tomatoes and I'm sure would be delicious made with fresh tomatoes in the middle of August.  However, I accidentally made ricotta by overheating my yogurt mixture last week, so I just pretended that it was the middle of August now.  I made this batch with basil, but any soft herb (parsley, chives, even thyme) would be good.

Baked ricotta rolls
2 cups of ricotta cheese
8 dried lasagna sheets
1 28-oz can of whole peeled tomatoes in juice, crushed with your hands
3 cloves of garlic
1 cup of grated Parmesan cheese, divided
1 cup of basil or parsley, chopped and divided, plus whole leaves for baking
Salt, pepper, olive oil, nutmeg

Preheat the oven to 350 degrees, put a medium pot of water on heat to bring to the boil, and start heating a large saute pan for the tomato sauce.  Peel and lightly crush 2 of the garlic cloves, drop them in the pan to be used for the tomato sauce, and saute them in a couple of tablespoons of olive oil over medium heat. When both sides of the garlic have gotten a golden brown color, add the tomatoes (watch for splatter) and let the sauce simmer for 15-20 minutes until slightly thickened.  Stir in salt, pepper, and 1/2 cup of basil.

Your pasta water should be boiling by now.  Salt it well and add 8 sheets of lasagna pasta, stirring to prevent sticking. Cook for 8-9 minutes, or until cooked enough to be pliable, but not fully cooked. Take the pasta out of water and let rest, separated from each other, on a plate (pasta sheets will want to stick).

Mix ricotta cheese with 1/2 cup of Parmesan, a finely chopped remaining clove of garlic, and remaining basil, salt, pepper, and a few swipes of freshly-grated nutmeg.  Position the lasagna sheets a short end in front of you.  Put 2-3 tablespoons of filling on one end of the sheet, then roll gently.  Pour the tomato sauce into a baking dish and nestle the pasta rolls into the sauce.  Top the rolls with 1/2 cup of Parmesan and put a basil leaf on each roll, if you would like.  Bake, covered for 20-25 minutes.  Then uncover and broil for a few minutes until the cheese is bubbling and lightly toasted.  Let cool for 5 minutes, serve and enjoy, perhaps with that boring roasted broccoli.